
Polls: How to setup
Using Polls in Zoom Meetings
Zoom offers the option to set up Polls in your meeting to run with you attendees. This could be something fun, like asking where people live or what the weather is like or something more specific to the meeting or course that you are running.
For more information on Polls, you can see the following page on the Zoom website: Polling for Meetings
Settings: Enable Polls in Your Meeting
Add Polls to Your Meetings
Using Polls in your Meeting
Settings: Enable Polls in Your Meetings
In order to start setting up polls, you must first make sure that you’ve enabled Polls in your Meeting Settings. To do this, first sign in to Zoom on the Web (To log into your University of Otago Zoom Account, click here and Sign In using your University of Otago credentials).
Next, select “Settings” from the menu on the left of the screen.
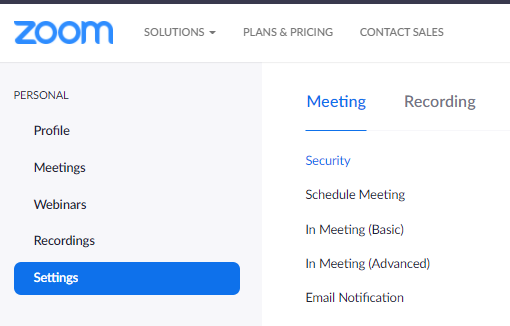
Select “In Meeting (Basic)”, then scroll down to “Polling” and make sure that this option is turned on.
Add Polls to Your Meetings
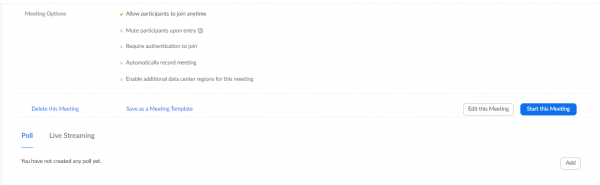
Next, schedule a new meeting via the Zoom Website (see this page for detailed instructions on how to do this: https://blogs.otago.ac.nz/zoom/scheduling-a-zoom-meeting/). Once you have your meeting set up, scroll down to the bottom of the page, and under “Poll”, select “Add”. See the screenshot below.
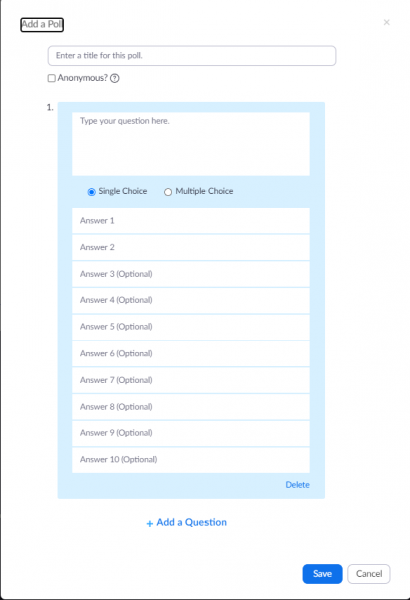
Now you can create your Poll – add a title, your Poll question, and the answers in the respective fields. You can choose to have either Single or Multiple Choice answers for your poll. Single choice allows participants to select only one answer, whereas multiple choice allows them to vote for as many options as they would like.
You can add multiple questions to a single Poll by selecting “Add a Question” at the bottom of the window. If you have multiple questions in one Poll, all of the questions in that Poll will appear for the attendees at the same time when you “Launch the Poll”.
If you want to split up your question sets, for example, by having a question or two at the start of the meeting and then another question at the end of the meeting, you should use multiple Polls. First, complete your Poll as above, then press “Save”. Then, “Add” another Poll and complete this. Now the questions will be in different sets, and in the meeting you can Launch these Polls separately.
Using Polls in your Meeting
Now that you’ve enabled Polls in your settings online, and you’ve created a new Poll for your Zoom Meeting, you should see an option on the bottom of your Zoom Window for “Polls”, see below for a screenshot of this:
![]()
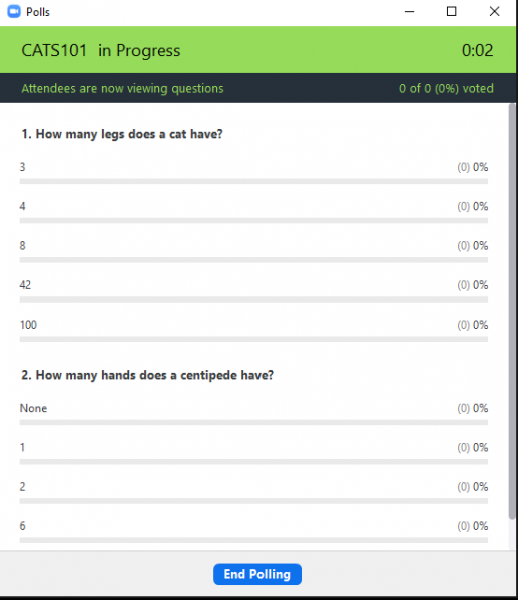
Select the Polls option, and you should get a window that contains your Poll and the questions. You can select “Launch Polling” from here, this will make the Poll visible to your attendees and allow them to select answers to the questions in the Poll.
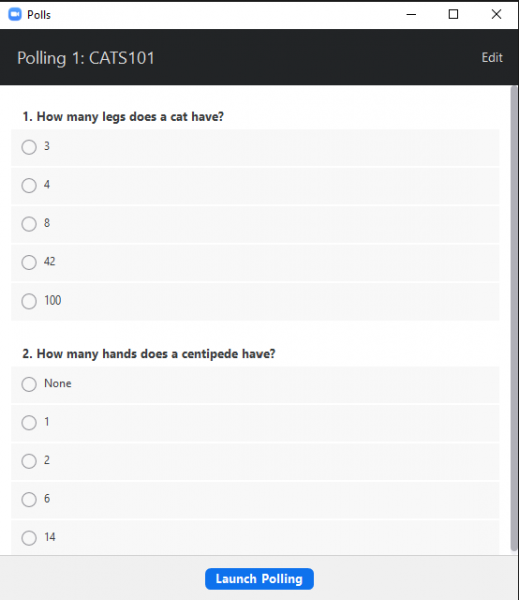
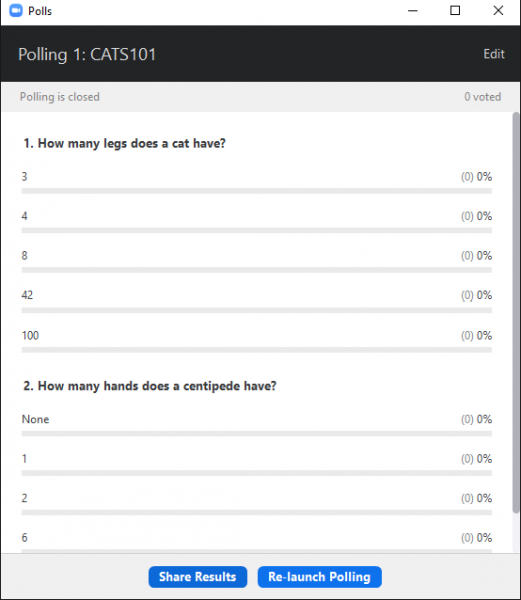
If you made multiple Polls, there will be an arrow next to the “Edit” button in the top right – clicking on this will expand the list and show you all of the Polls that you have made for this meeting.
Once you have ended the Poll, you can choose to either Share Results with the other attendees in the Meeting or you can “Re-launch Polling” to have the attendees answer the Poll again. Note: Re-Launching a Poll will clear away all the answers from the previous time the Poll was launched.
That’s all that you need to know about how to create and launch polls from within Zoom! If you want to learn about how to get usage reports for polls from your Meetings, please see our page on Reports by clicking here.