
How to trim your recording
Local and downloaded recordings
Editing Cloud recordings
If you have recorded your meeting in the cloud, then you can edit it easily from directly in there. (please note, if you have recordings auto-transferring to Echo360, then you would be best to edit the recording in Echo360, not Zoom’s cloud)
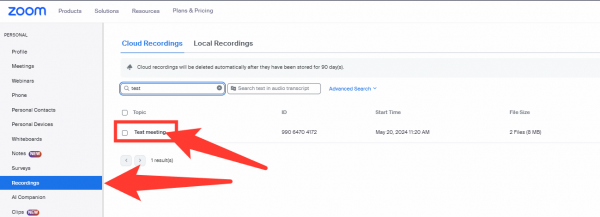
- Go to your cloud recordings via a web browser (click here or copy & paste this link into your browser: https://otago.zoom.us/recording/)
- Find your recording in the list of recordings under your account, then click on the title.
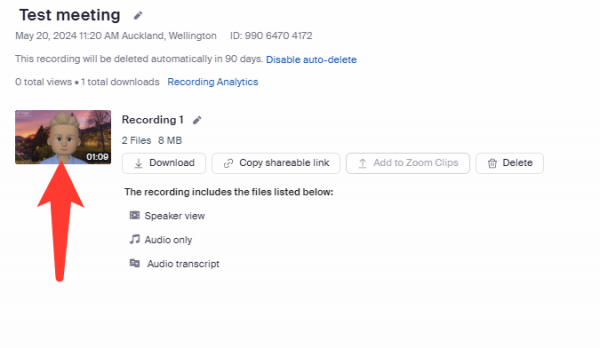
- Click on the still image of your recording to view and edit it.
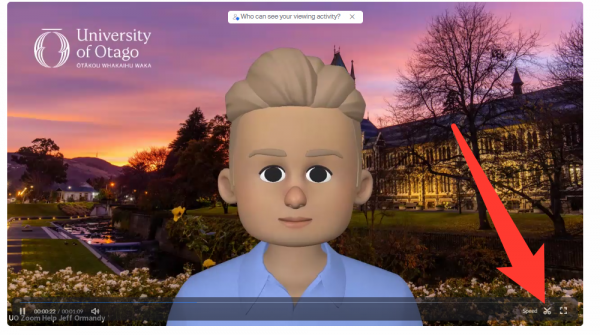
- When viewing your recording, click on the scissor icon bottom right
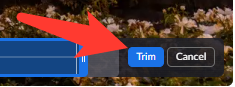
- A slider will appear at the bottom of the image. You can grab the ends of the sliders to adjust the start and end points to your preference. To fine adjust (1 second at a time), click on the small arrows in the time bubble just above the slider.

- If you wish to remove a section from within the recording (say a tea break or technical issue occurred) then use the end slide to go just before the section you wish to remove, then move your mouse to the grey area after the end of the 1st section and click the plus icon. This will create a new section you can adjust just as per above. Do this process again for any further sections you wish to remove.


- Once your edit is complete, click the Trim button bottom right to save your edit. Zoom will now process the changes and, once ready, your edited recording can be then be downloaded or shared with others.
Editing a local or downloaded recording
If you have made a local recording to your computer’s hard drive or you have already downloaded a cloud recording, then you can edit that using a video editing app on your computer.
For Windows , you can use Microsoft’s Clipchamp app (click the name for instructions on how to use that app).
For Mac, you can use iMovie (click the name for instructions on how to use that app).
Alternatively, you may also wish to use a more sophisticated video editing application. Blackmagic’s DaVinci Resolve is a fantastic free application to use for that purpose. There are many resources online which step through how to use the application .