How to Join a Zoom Meeting in a Computer Lab on the Dunedin Campus
You may be needing to teach from one of the Computer Labs about the Dunedin campus using Zoom to include online students or record.
Firstly, please ensure you have:
- Reviewed the Getting Started for Lecturers guide
- Enabled Cloud Recording on your Zoom account (if you intend to Record your Class)
- Checked you know your Host Key
- Become familiar with Zoom’s security options to help prevent any unwanted disruptions.
There is a specific way to join Zoom from one of these spaces and there is a guide you can print or have on your device to help you with this below:
How to Join a Zoom Meeting in a Computer Lab
Also, here are the instructions in this guide:
- After logging into the student desktop, click on the “Zoom for Lecturers” icon
![]()
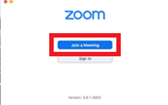
- Click the ‘Join a Meeting’ Button
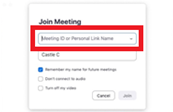
- Enter the Meeting ID
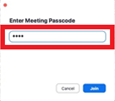
- Enter the Meeting Passcode
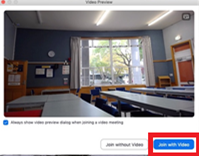
- If prompted, select ‘Join with Video’ so you can be seen on Zoom
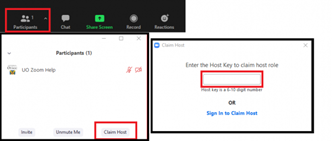
- Enter Host Key to get host rights. Click the Participants button then Claim Host Enter your 6 digit Host Key.
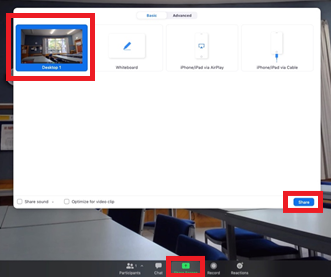
- To share the screen, Click the green Share Screen button in Zoom, then, in the pop-up window, leave the default option selected (being ‘Desktop 1’) and simply click the blue Share button bottom right. (This will share the whole desktop so those online will see the same as what you see i.e. your PowerPoint, browser window, Word doc, Excel, YouTube, etc. or whatever you wish).
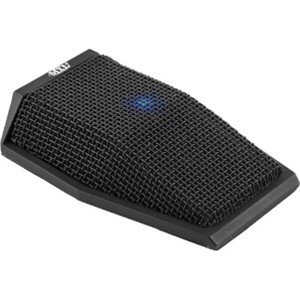
- The room will have a webcam and microphone like below. The webcam can be manually repositioned to better capture the presenter or audience, to your preference. Make sure the microphone is pointing at the presenter to be heard.

Note: If you wish to record your class, you will need to enable Cloud Recording on your Zoom account. You can find details about how to do this on the following page: How to enable cloud recording
Once you have enabled Cloud Recording on your account, all of your future meetings will be able to be recorded to the Cloud. Then, simply press Record in your Zoom Meeting, then choose “Record to the Cloud”.


