
Test your Meeting and your Setup before your first class
After scheduling your Zoom meeting, join the meeting you have created for your students and test your settings.
Tip: Ideally do this well in advance of your first class to help avoid any unnecessary delays on the day.
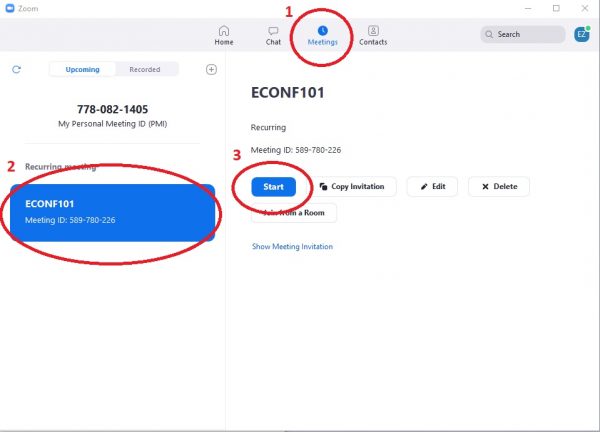
- Go to the “Meetings” tab on the Zoom app
- Select the correct meeting for the class
- Click “Start”
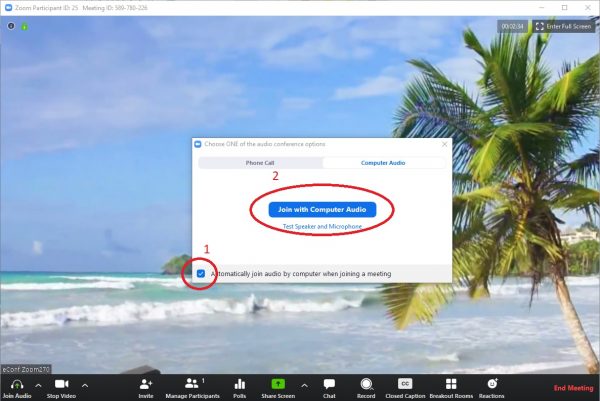
- Tick “Automatically join audio by computer…”
- Click “Join with Computer Audio”
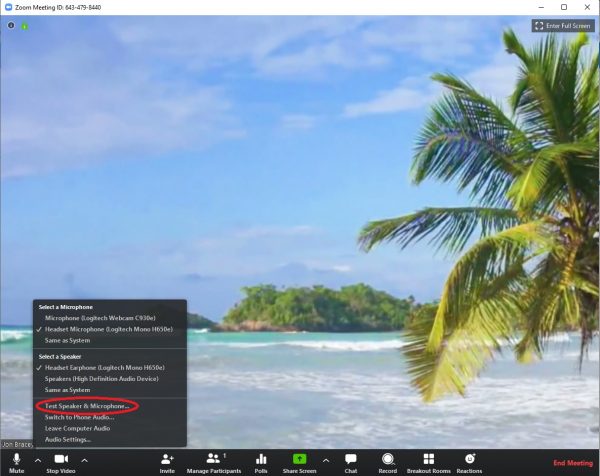
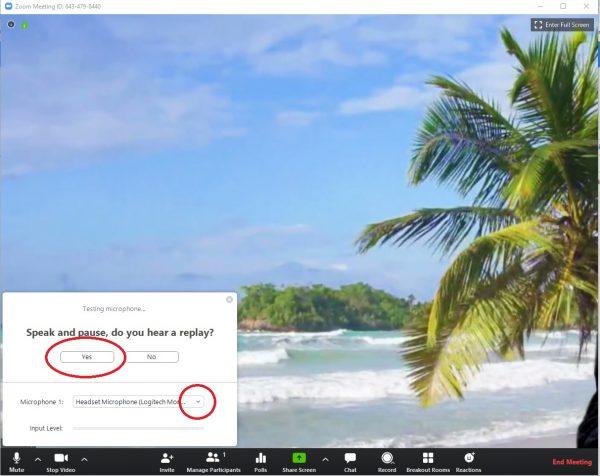
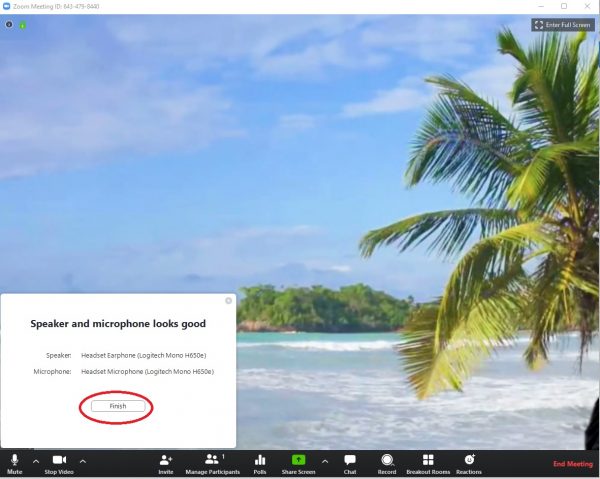
Next, test that your audio settings are correct.
- Click the up arrow next the microphone symbol in the bottom left hand corner
- Choose “Test microphone and speaker” from the list
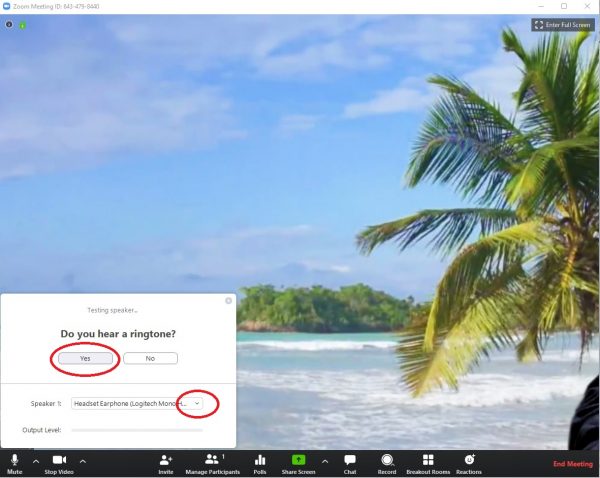
You will then be stepped though checking if your speaker and microphone have been selected correctly, please follow the prompts on the screen.
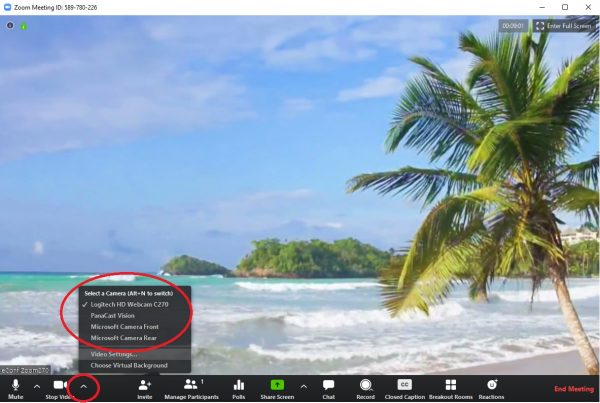
Finally, check that your camera has been selected correctly. Tip: only need to do this step if you are not already seeing yourself.
- Click the up arrow next to the camera symbol bottom left
- If you have more than one camera option, try the others in the list until you see yourself
Tip: if you believe you have the correct camera selected but are still not seeing yourself, please check:
- You don’t have a privacy cover over your camera lens
- Your laptop may be in a docking station and closed, so you will need to open your laptop for your camera to see you
- Your computer may have privacy settings preventing Zoom from using your camera, please enable this in your systems settings (or get your IT Desktop Support to help you with this)