
The Home folder in ArcGIS
The problem
Isn’t it annoying having to constantly navigate to this that and the next place to save, export or open files? This is especially an issue when dealing with ArcGIS where you have connections between data and maps to maintain.
The solution for ArcGIS 10.0: the Home folder
The home folder is the folder where your map is saved. So if you locate your maps as high up your folder hierarchy as possible you can navigate to all your data from there.
Home folder in ArcCatalog
The Home folder in ArcCatalog appears at the top of the list. Sometimes you need to scroll up to see it.
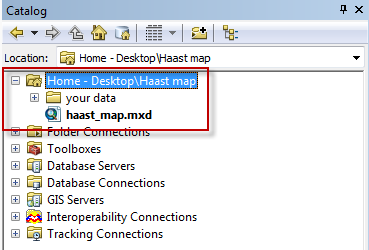
The Home folder in ArcCatalog sidebar
Home folder in Save or export dialog
The Home folder also appears on the save or export dialog boxes. It’s pretty subtle though (I only just noticed it!).
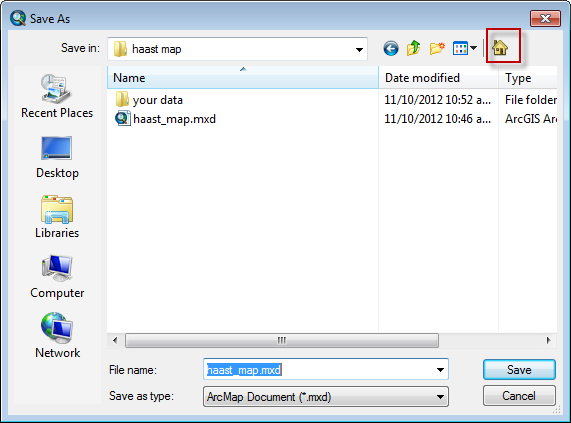
The home folder in save and export dailogs (red box)
The home folder appears in a few other places where you open/save/export/import. Keep a look out for it to save time!
Aligning multiple images in photoshop
We want images stacked
Sometimes we capture images of the same area (e.g. a particular part of a thin section) using different conditions (reflected light, PPL, XPL, Cathodoluminescence) . We may then want to stack the images together so that we can see how each different mineral, for instance, appears under the different conditions.
THE PROBLEM
We can align objects manually because we see recognisable features in each image. It can be a little tedious and difficult trying to add, manually align, resize and rotate the images in software like: Adobe Illustrator, photoshop, the gimp, image j or other software.
There is a semi-automated way to speed up this process in photoshop. I’m not sure of the exact conditions under which this will actually work. But it’s fairly easy to try and could save you a load of time.
How to do it
The first thing we need to do is to load all the images as layers in a photoshop document.
- Open photoshop
- Go to file>Scripts>Load files into Stack
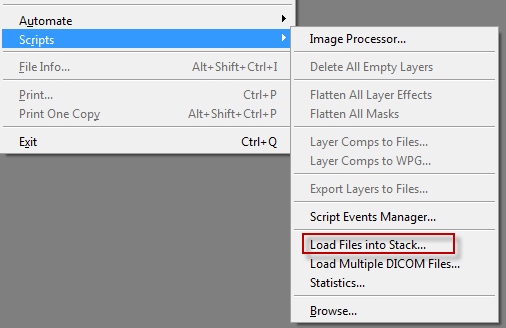
- Navigate to the folder with your images in it and load these.
You should now see all your images as layers in photoshop with names corresponding to file names (handy eh?).
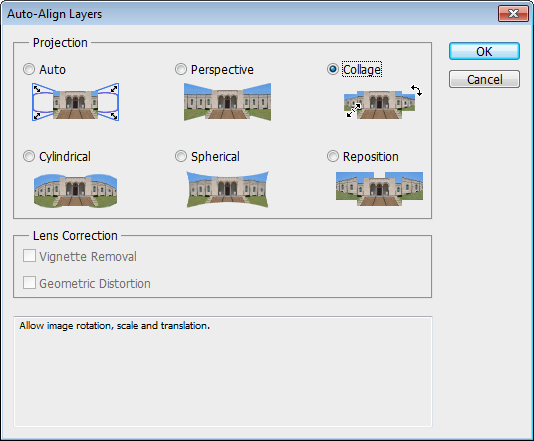
- Select all the layers by clicking on the top layer and then shift clicking on the bottom layer. They should all have a blue background in the layers panel indicating they are all selected.
- Now go to edit>auto-align layers
- I recommend trying collage first which will not distort the image.
Thanks to Steve Kidder for working this out with me.
Macro-photography setup
The macro-photography setup in the Geology Department, University of Otago, comprises: a copy stand, a DSLR camera with a macro-lens and a computer for controlling the camera and capture.
What is it for?
Taking photos of samples, specimens etc. close up. The setup has a maximum field of slightly smaller than an A4 sheet of paper. The smallest field of view is the size of the sensor: 22.2*14.7mm. Because you can capture 4272 x 2848 (L) pixels on this 22.2*14.7mm sensor your pixel density is 4888 ppi. This is much more than the 300ppi needed for print, so digital zooming and cropping will get you a lot closer with good results (see sample images in poster below).

Guidelines for use of the macro-photography setup. This poster is beside the equipment.
Scanning instructions and Learn to scan
Scanning instructions
I have put a poster in the Graphics Lab above the scanners. This posters provides very basic instructions for common scanning tasks.
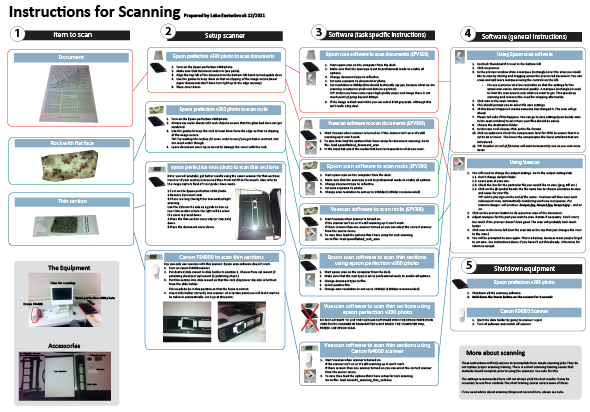
The poster with scanning instructions that I have put in the Graphics Lab
Learn to Scan
I have also prepared a quick scanning training exercise for people who want to use scanners. It is designed to be used with the scanning poster. I recommend that anyone who wants to use scanning equipment should go through this training exercise. Come see me to collect the training exercise.
Any feedback on the poster or training exercise is very welcome.
