
Macro-photography setup
The macro-photography setup in the Geology Department, University of Otago, comprises: a copy stand, a DSLR camera with a macro-lens and a computer for controlling the camera and capture.
What is it for?
Taking photos of samples, specimens etc. close up. The setup has a maximum field of slightly smaller than an A4 sheet of paper. The smallest field of view is the size of the sensor: 22.2*14.7mm. Because you can capture 4272 x 2848 (L) pixels on this 22.2*14.7mm sensor your pixel density is 4888 ppi. This is much more than the 300ppi needed for print, so digital zooming and cropping will get you a lot closer with good results (see sample images in poster below).

Guidelines for use of the macro-photography setup. This poster is beside the equipment.
Scanning instructions and Learn to scan
Scanning instructions
I have put a poster in the Graphics Lab above the scanners. This posters provides very basic instructions for common scanning tasks.
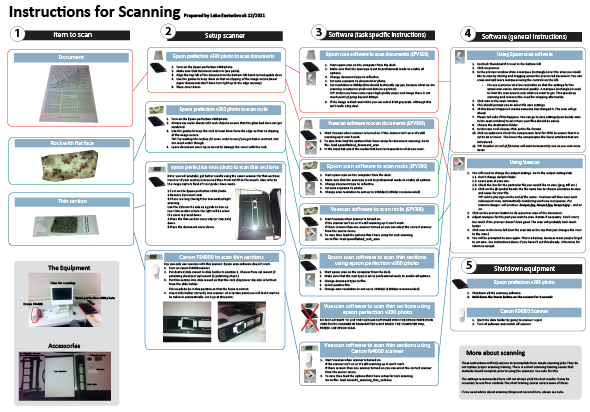
The poster with scanning instructions that I have put in the Graphics Lab
Learn to Scan
I have also prepared a quick scanning training exercise for people who want to use scanners. It is designed to be used with the scanning poster. I recommend that anyone who wants to use scanning equipment should go through this training exercise. Come see me to collect the training exercise.
Any feedback on the poster or training exercise is very welcome.
Welcome
This is my first post. This blog will be used for disseminating information primarily for geology department staff and students. Find out more about this blog. I hope to have posts with illustration and GIS tips and tricks and announce upgrades and changes to equipment and software etc. around the department.
