
3D Block diagram incorporating topography (using some non-free software)
In this exercise we want to make a block diagram that incorporates topography into it. We will use a blank block model created in Leapfrog Geo. Using DEM data extracted using ArcGIS. Then we will sketch and annotate on this using adobe illustrator.
Sketching stage
Normally we would start by sketching our diagram. But it can be difficult to sketch topography without seeing it first. That is why we will start by making a blank block instead.
Making the blank 3D topography block in Leapfrog Geo
Leapfrog Geo is a great package for 3D geological modelling. In fact we can make full 3D geological models the full way through using Leapfrog Geo if we wanted. But that’s not necessarily going to be the fastest approach.
Have a look at some introductory tutorials in Leapfrog Geo (there are some built in tutorials you could try out).
Extracting the elevation data using ArcGIS and importing into Leapfrog Geo
The first thing we need is an elevation model. For NZ we have Survey school 15m DEM over NZ. I will be using the example of a model over the Waitangi-taona River area. This tutorial refers to the GIS database in the Geology Department. But data can also be cropped and downloaded from
https://koordinates.com/publisher/university-of-otago-national-school-of-surveying/data/?mt=roadmap&lpw=650&cv=0&z=6&c=-41.00000%2C174.00000&e=0
- Start a new leapfrog project and save it in a folder called 3D topo model
- Create a new blank ArcGIS map in your 3D topo model folder
- Add topo250 maps and Surv_nz_dem_15m from GIS database “T>main_data.gdb>”
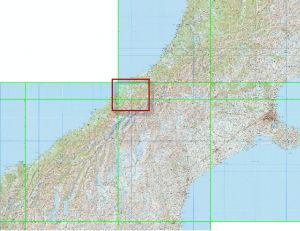
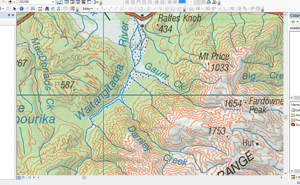
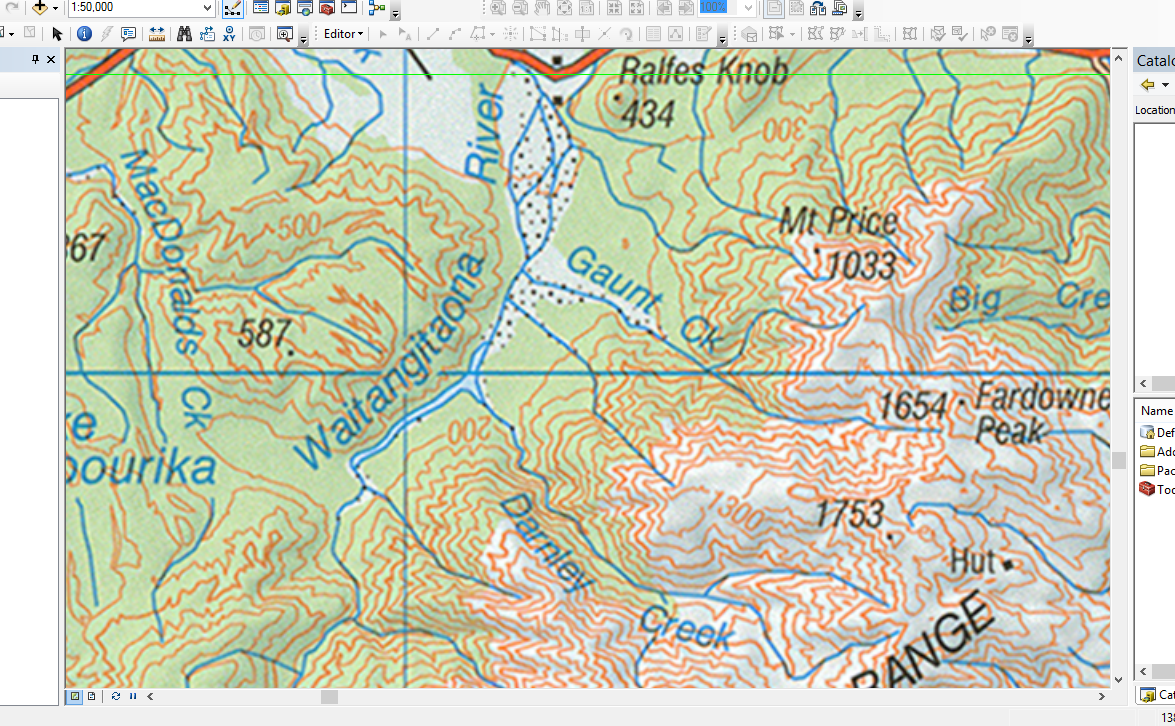
- Use the topo250 maps to navigate to the Gaunt Creek area which is north of Franz Josef on the West Coast. Your ArcGIS window should look about the same as the one below.
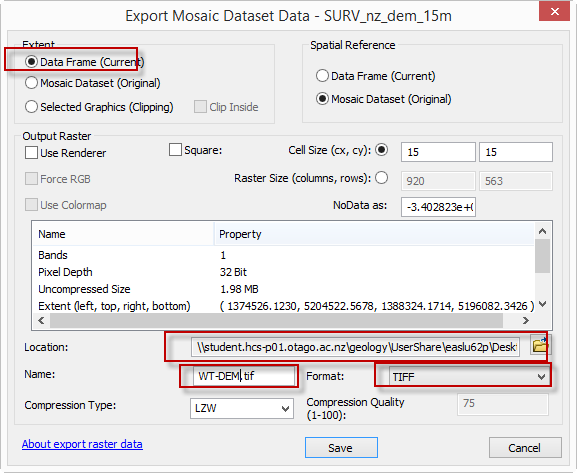
- Right click on the Image under “Surv_nz_15m_DEM” and choose export data.

- Set Data frame for extent (so that it just exports region from data frame)
- Click on location and navigate to and highlight the3D topo model and choose Add. IMPORTANT: ArcGIS is asking for you to select a Workspace (folder) here so you need to highlight a folder and choose Add.
- Give it a filename and choose type TIFF.
- Save it.

- Don’t add to map.
- Import the topography that you just created from the tutorial folder and drag it into the scene. Right click on topography>Import elevation grid.


Creating the blank model in leapfrog Geo
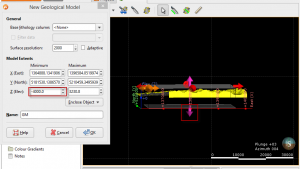
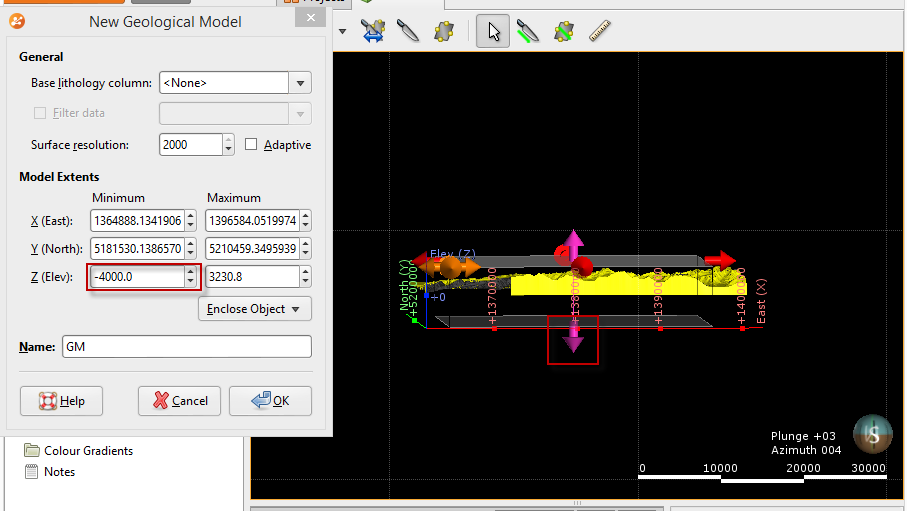
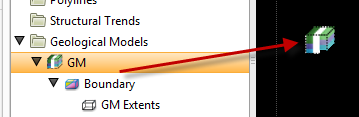
- Right click on Geological model and choose New GM.
- Set the lower elevation for the model by either dragging down from the bottom or inputting it
- Drag the sides in a little bit.
- Accept other defaults then click OK
- Some processing will run for a bit. You will have to wait.
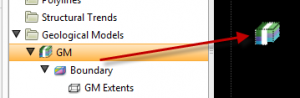
- Clear the scene
 and then add your GM
This would work as a blank. Except that we want a different bounding box for the model. - Press D to look right down.
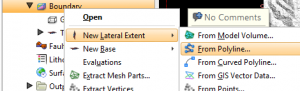
- Right click on GM>Boundary and choose New Lateral extent>From Polyline
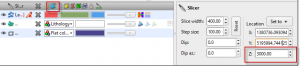
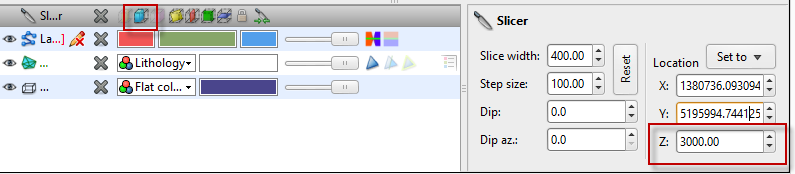
- Move the slicer up to 3000m and set mode to remove front.
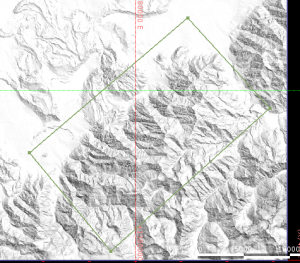
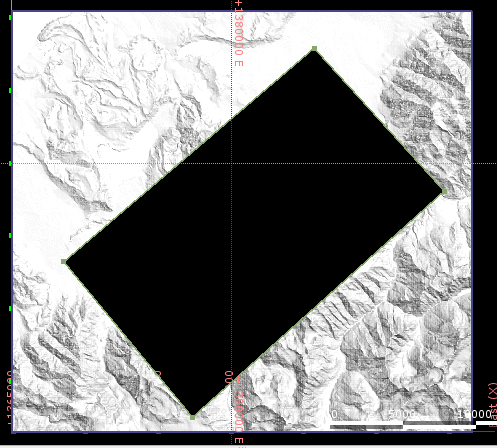
- Click on draw lines.
- Draw a polygon that runs parallel to the range front as so:
- Click on Save. This will make the model recompile.
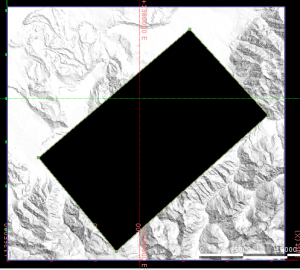
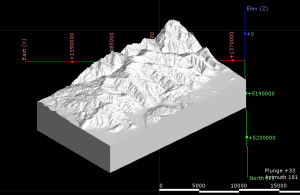
- If your model looks like this you just need to flip all polygons
 and Save to fix it.


Exporting from Leapfrog Geo
Now that we have our blank we need to export it.
- Clear the scene
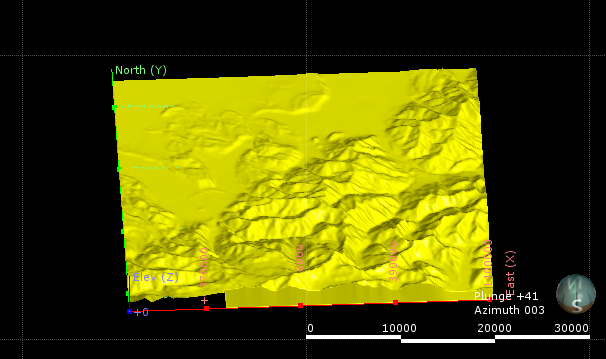
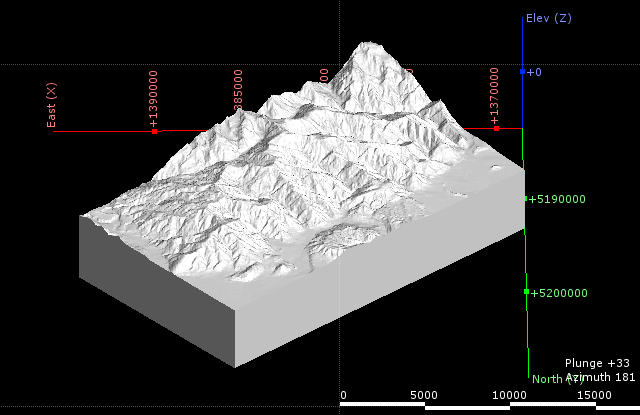
- Position the view so that you are looking obliquely from the north.
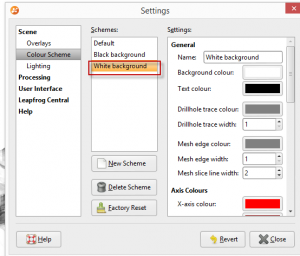
- Change the background colour to white in Leapfrog Geo Settings.
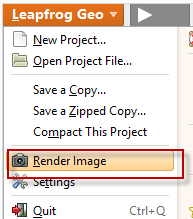
- Click on Leapfrog Geo>Render Image
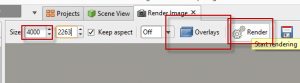
- Bump up the size. Turn off the overlays and Click on Render.
- Save the Image. And open it up in photo viewer. We now have our blank.


TIP: if you are not entirely happy with the blank you can go back and adjust any of the extents you used in Leapfrog Geo and the model will update.
Sketching and annotating stage
Now that we have our blank we can go on to our sketching and annotating stage. We can either use the blank as is or use it as a basis for a sketch of the block. I will demonstrate using a sketch on top.
Drawing a sketch version of the blank 3d topo block (optional)
- Print out a few copies of your blank on A4 in greyscale
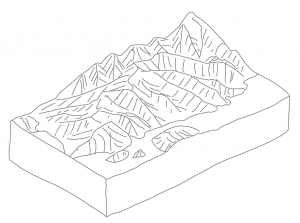
- Using a light table (preferred) or a window, sketch over the block onto a fresh sheet of paper in pen (preferably a pen with a nib that produces a nice clean line, biro is not as good).
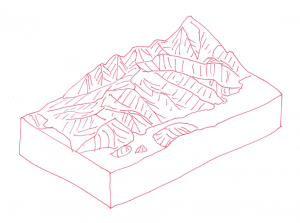
- Draw simple lines that represent the topography. In the example below I started by drawing the major ridgelines and then some simple lines coming down to represent the shape of the hills. Lines in breaks of topography (e.g. from hills to valley floors work well too).

Digitising a sketch version of the blank 3d topo block (optional)
Next we want to digitise this sketch. But it’s not entirely necessary we could use the sketch as is and combine with some separately drawn annotation.
- Scan the drawing in at reasonable quality (300ppi TIFF non compressed).
- Open adobe illustrator and import the sketch.
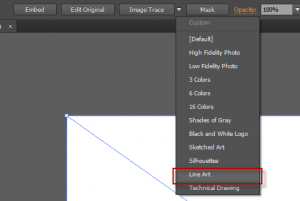
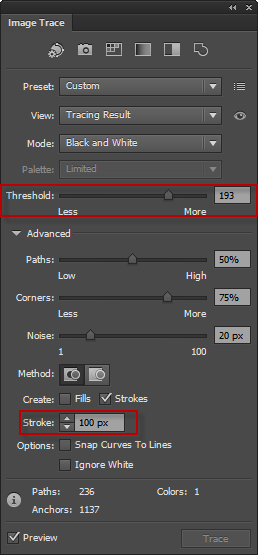
We are going to try a quick approach (which often produces mixed results) called image trace (or live trace). This is where the raster image is turned into vector objects using parameters we supply. - Click on the image. Then in the control panel choose Image Trace> Line Art
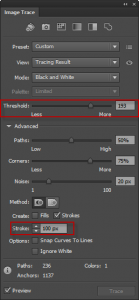
- Click on the menu button in the control panel to change options

- The idea is to get all of the lines you drew to be recognised as paths. You will probably only need to change the threshold value to get this to work. You might also need to change the stroke threshold in advanced options.
- When you are happy with the tracing result Click on expand

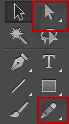
This creates a group of paths (and usually removes the base image). - You may want to clean up some of the lines e.g. where lines go over edges. Use the direct selection tool to select/move and delete (or the pencil/pen tool to adjust lines).
- Now that it is vector lines you can easily change the stroke width and colour. Set the sketch to a mid-grey 1 pt stroke width.


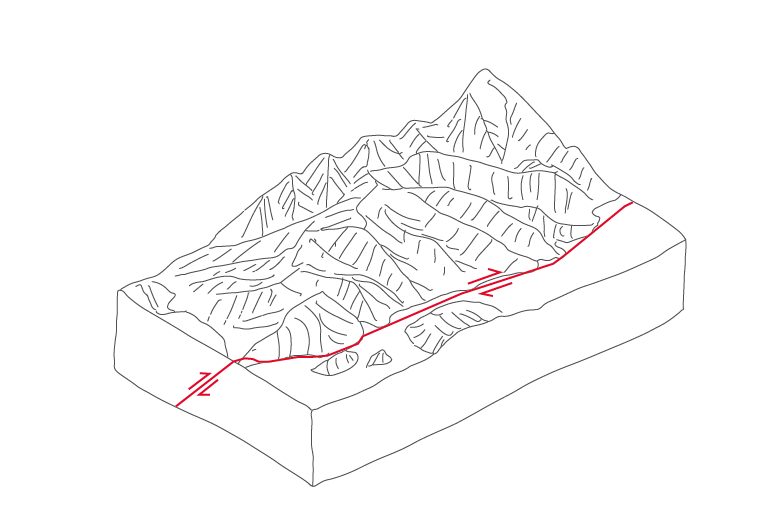
Annotating and digitising
Once we have our blank we can sketch features on in illustrator directly. Or we can sketch by hand, scan and digitise.
Back to: 3D Geology diagram techniques