Margins for printing
Document types and margins
Typically for text documents such as articles, or reports there will be more than 3mm of white margins all around the documents so there is little need for us to concern ourselves with printer margins. It is only when we create posters, fliers and booklets that we need to consider printing margins.

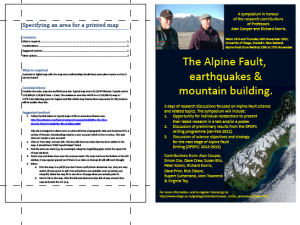
Image showing margins for posters vs word documents. On the left is a ms-word doc with plenty of margin. On the right is a poster with no margin. Printing the poster on the right without scaling first will cause 3mm of clipping of the image all around. The text will be too close to the edges and there may be problems with the image in the top left
Margins and professional printing
If we are going to a professional printer then we can create documents that go right up to the edges and they will be able to print these. Sometimes bleed will need to be added (where extra colour is printed around the edges of a document) that is later trimmed off by the printer. The use of bleed ensures that the colour goes right to the edges of printed documents.
Margins for consumer printers that use sheets
Most consumer printers will not print right up to the edges of paper and commonly require around 3mm of margins all around the document. This doesn’t mean that it is necessary to leave 3mm of edges white, if the document has colour right up to the edges then the last 3mm of colour will simply not be printed.
It should be noted that we do not want text to be right up against the margin even if it is not cut-off. We usually want at least a cm between the text and the edge of a page.
Ideally we could have considered the margins before we started making the document. If we have not there are a couple of options available to us.
- We could modify the document so that there is at least 3mm of margin (or content that will not be printed)
- We can simply scale the document when we print it
If we are using option 1 above then the exact approach will depend on the software used to edit the document. If we are using option 2 then the approach will depend on the software used to print the images.
Printing and scaling
Printing can be kind of confusing because of the variation and duplication of options between the software used to print, the printer drivers and potentially the printer itself.

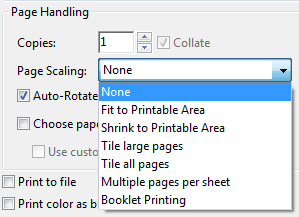
Menu for setting page scaling in adobe acrobat
There is usually an option in the software used to print that allows you to scale the page to fit the printable area (paper – printer margins). If you are printing to A4 and your printer needs 3mm of margin then the printable area will be 297mm-3mm= 294mm by 210-3mm=207mm, which equates to scaling by 97%.
Margins for large format printing on the geology plotter
For a breakdown on printing on the geology plotter (large format printer for posters maps etc.) please look at this poster: printing_on_the_plotter
TIP: A good trick with printing is to print a document to a pdf first to check if there are any issues with printing. Be aware that saving to a pdf in word reduces qualtiy of graphics, it is best to print to a pdf. Most professional printers prefer printing from pdf format (including otago uniprint) for text documents (e.g. theses).


