
These are detailed instructions for different approaches to handling images in MS word 2013 and producing PDF export at the end. These instructions also apply generally to versions from 2010 onwards…
Introduction
It is typical to have images embedded in MS word documents (linking images is possible, but problematic). This document describes how MS word handles images and which methods/settings should be used to get the best results.
Image file formats
The best thing you can do for your images is make sure you are exporting your images at a reasonable pixel count (resolution >= 300ppi and image size matches size on page). See Preparing illustrations for use in theses, reports and publications. Another thing to make sure is that you are using the correct image file formats. If you aren’t familiar with file formats and options for saving the safest formats to use are TIFF for photos and PNG for graphics. JPEG uses lossy compression and if you are not careful about applying settings the quality of the jpeg images in a final document can be poor.
Importing images into MS word
Recommended approach is to do “INSERT>Pictures” This approach will pull the images in and keep them in their original file format.
An alternative approach is to drag and drop. But this approach will sometimes produce locked images (see note below).
Drag and drop issues: locked images that won’t downsample!
In some versions of MS word if you drag and drop an image in it will default to some weird paragraph formatting. This prevents certain editing and effects being applied in MS word (see comparison figures below):
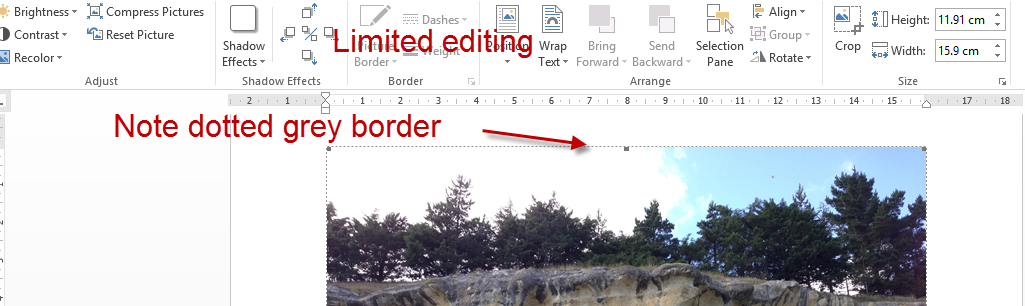
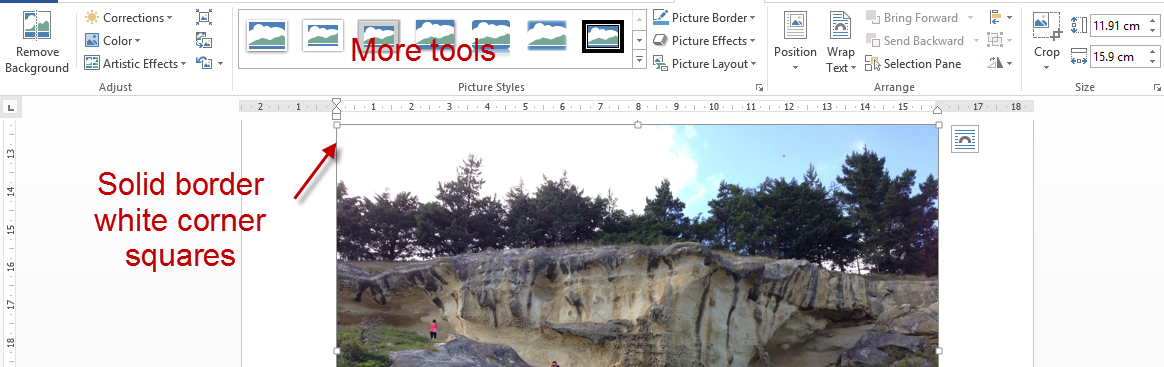
It also prevents the image from being down sampled when you save the document.The workaround is to cut and paste the image in place (Ctrl+x, Ctrl +V). If you put images in from Insert>picture this will not be an issue.
Handling images in MS word 2013 PC
There are a couple of options for handling images in MS word.
Handling images OPTION 1 – Setting up your MS word document to 220ppi downsampling (recommended for ease of use)
220ppi is a good resolution that you’ve probably been using by default for a while. It’s difficult to tell the difference between 220ppi and some higher resolution on an average to higher end printer.
MS word has settings for how much images are downsampled (reducing resolution). This is a setting that is stored for each document but can also be set as a default for all new documents. Usually this is 220ppi resolution by default. But to make sure we can set it explicitly.
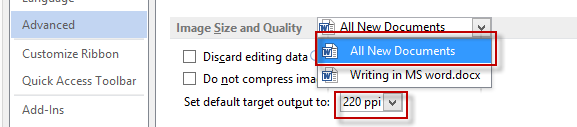
- Go to File>Options>Advanced
- Scroll down to Image Size and Quality
- Using the drop down set this option for all new documents
- Set default target output to 220ppi
Images will be downsampled as soon as you save the document. In some cases PNG and TIFF will not be downsampled (I have no idea why this happens).
TIFFs and PNGs will not be compressed, so you could use these formats if you want no JPEG compression applied. If the images are JPEGs they will be compressed to level 8 (high quality). This is usually not noticeable for photos but will have a minor effect on graphics type images with high contrast areas (as a consequence of JPEG compression). But in these cases you should be using PNG instead of JPEG because PNG is for graphics and JPEG is for photos.
If you want to change downsampling settings for individual documents choose the document you are working on from the drop down list instead.
Handling images OPTION 2 – Setting no downsampling (Advanced method for maximising quality)
If you want to get no downsampling in MS-word:
- Go to File>Options>Advanced
- Scroll down to Image Size and Quality
- Choose the current document from the drop list
- Check the “Do not compress images in file” box
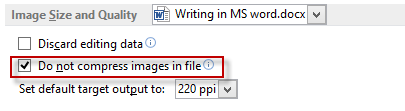
This will also not apply any compression to JPEGs.
PDF save or export
In general it is best to print or publish documents as a PDF rather than an MS word document. The main reason is that PDFs will generally look the same regardless of which OS (mac, windows, linux) or software package opens them. This is not necessarily the case for MS word (though this is generally much improved in recent versions of MS word). Another reason is that the output to PDF generally reflects what the output in print will be. So if there are some issues in the document you can catch them at this stage.
PDF export OPTION 1 – Print to PDF using Adobe PDF printer (Preferred method)
Use the Adobe PDF printer which is installed as part of the Adobe creative suite to make high Quality PDFs. Instructions for other PDF printers follow.
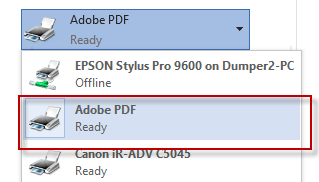
- Choose File>Print and then pick Adobe PDF from the printer list
- Go to Printer properties. I recommend setting Default settings to High Quality Print (300ppi for images above 450ppi). This will set images that are larger than 450ppi to 300ppi and set compression level to 9 (slightly less than max quality). It will not change images or their file types if they are less than 450ppi.
- Be Sure to also set PDF page size to A4
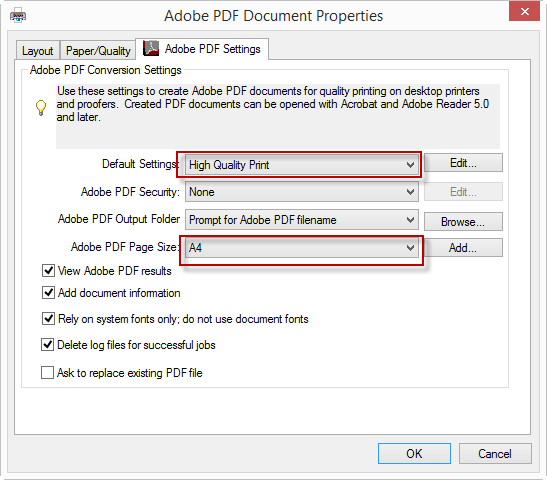
- You can edit/check the “High Quality Print” settings by clicking on Edit.
Note: Even though it says PDF page size is A4 it will still deal with A3 pages
PDF export OPTION 2 – Print to PDF using cutepdf writer (some issues with certain TIFF and PNG files)
- Go to print
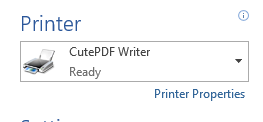
- Choose CutePDF writer from the printer list
- Go to printer Properties, click Advanced and change the print Quality to 1200ppi, this will fix some issues with PNG files.
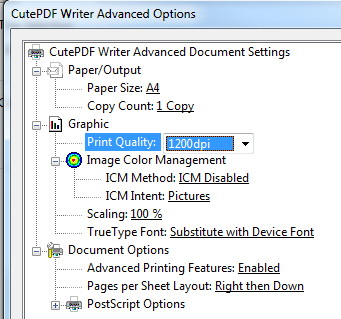
This will produce pretty good results. But I did notice some spurious colours for PNG and TIFF files when CUTEPDF resampled the image. Setting the PDF output to 1200ppi (as noted above) should fix the problem for PNG files.

PDF export OPTION 3 – Save as pdf from ms word (lower quality PDFs)
This method creates PDFs with low quality images, but it is quick and ok for general purposes
- Go to file>save as and choose a location to save.
- Choose PDF from the Save As type.
- Choose optimize for “Standard (publishing online and printing)”
Compression and downsampling
If you just choose save from here it will save a PDF with images downsampled to 200ppi and highly compressed (JPEG-0)!
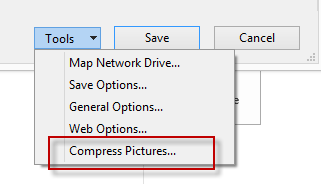
There are options for how much downsampling is applied at export (but no way to change the JPEG compression). To set these: go to Tools>Compress pictures
What are the options?
- If you choose “Use document resolution” whatever setting you choose in image size and quality in word will be used.
- If you choose not to compress images in MS word and pick “use document resolution” you will get 200ppi images.
- If you pick from one of the options available you will get that resolution.
So basically the best you can get using this method is 220ppi images at high JPEG compression (0= bad quality).

Left: Uncompressed PNG | Right: Low quality (highest compression) JPEG created when saving to PDF in ms word
Note: if you use PNG for images then PNG lossless compression will be retained (i.e no lossy JPEG compression).

2 comments on “Handling images using MS word PC (2013)”
Thanks for the very nice tutorial. I have Word Professional 2010 64-bit and Acrobat Professional X. The Adobe PDF printer driver will produce screen resolution images at any setting. If I use the PDFMaker plugin or Acrobat Distiller, I get full resolution images in the output PDF but these suffer from other issues. The same Word document produces a fine PDF using Word 2007 / Acrobat 8 on another PC.
Hi, sorry for the slow reply. Where have you set the resolution in acrobat printer? This might be the best place: go to Control panel>Devices and Printers and then right click on Adobe PDF printer. Got to paper/Quality Tab and then Advanced and choose the Print Quality.
I don’t have a vanilla setup now so I can’t tell what the problem might be. Good luck.