
Notes and bookmarks within Otago Capture
The new Otago Capture system will bring students the ability to make notes and annotations within the same system they use to view the lecture recordings.
Obviously, it has always been possible for students to take notes on their lectures. The advantage of the new note taking tools in Otago Capture is that they link these notes in a very direct and straightforward way to the course content they pertain to.
Each annotation is taken alongside a moment in the recording, and a timestamp for that moment is created alongside the note. When a student revisits her notes later, she can click on the accompanying timestamp for a given annotation, to go back to the precise moment in the recording that gave rise to her comment.
If no particular comment is required, the system also allows for users to create bookmarks, which highlight key segments for later revisiting. Both comments and bookmarks are illustrated in the screenshot below.
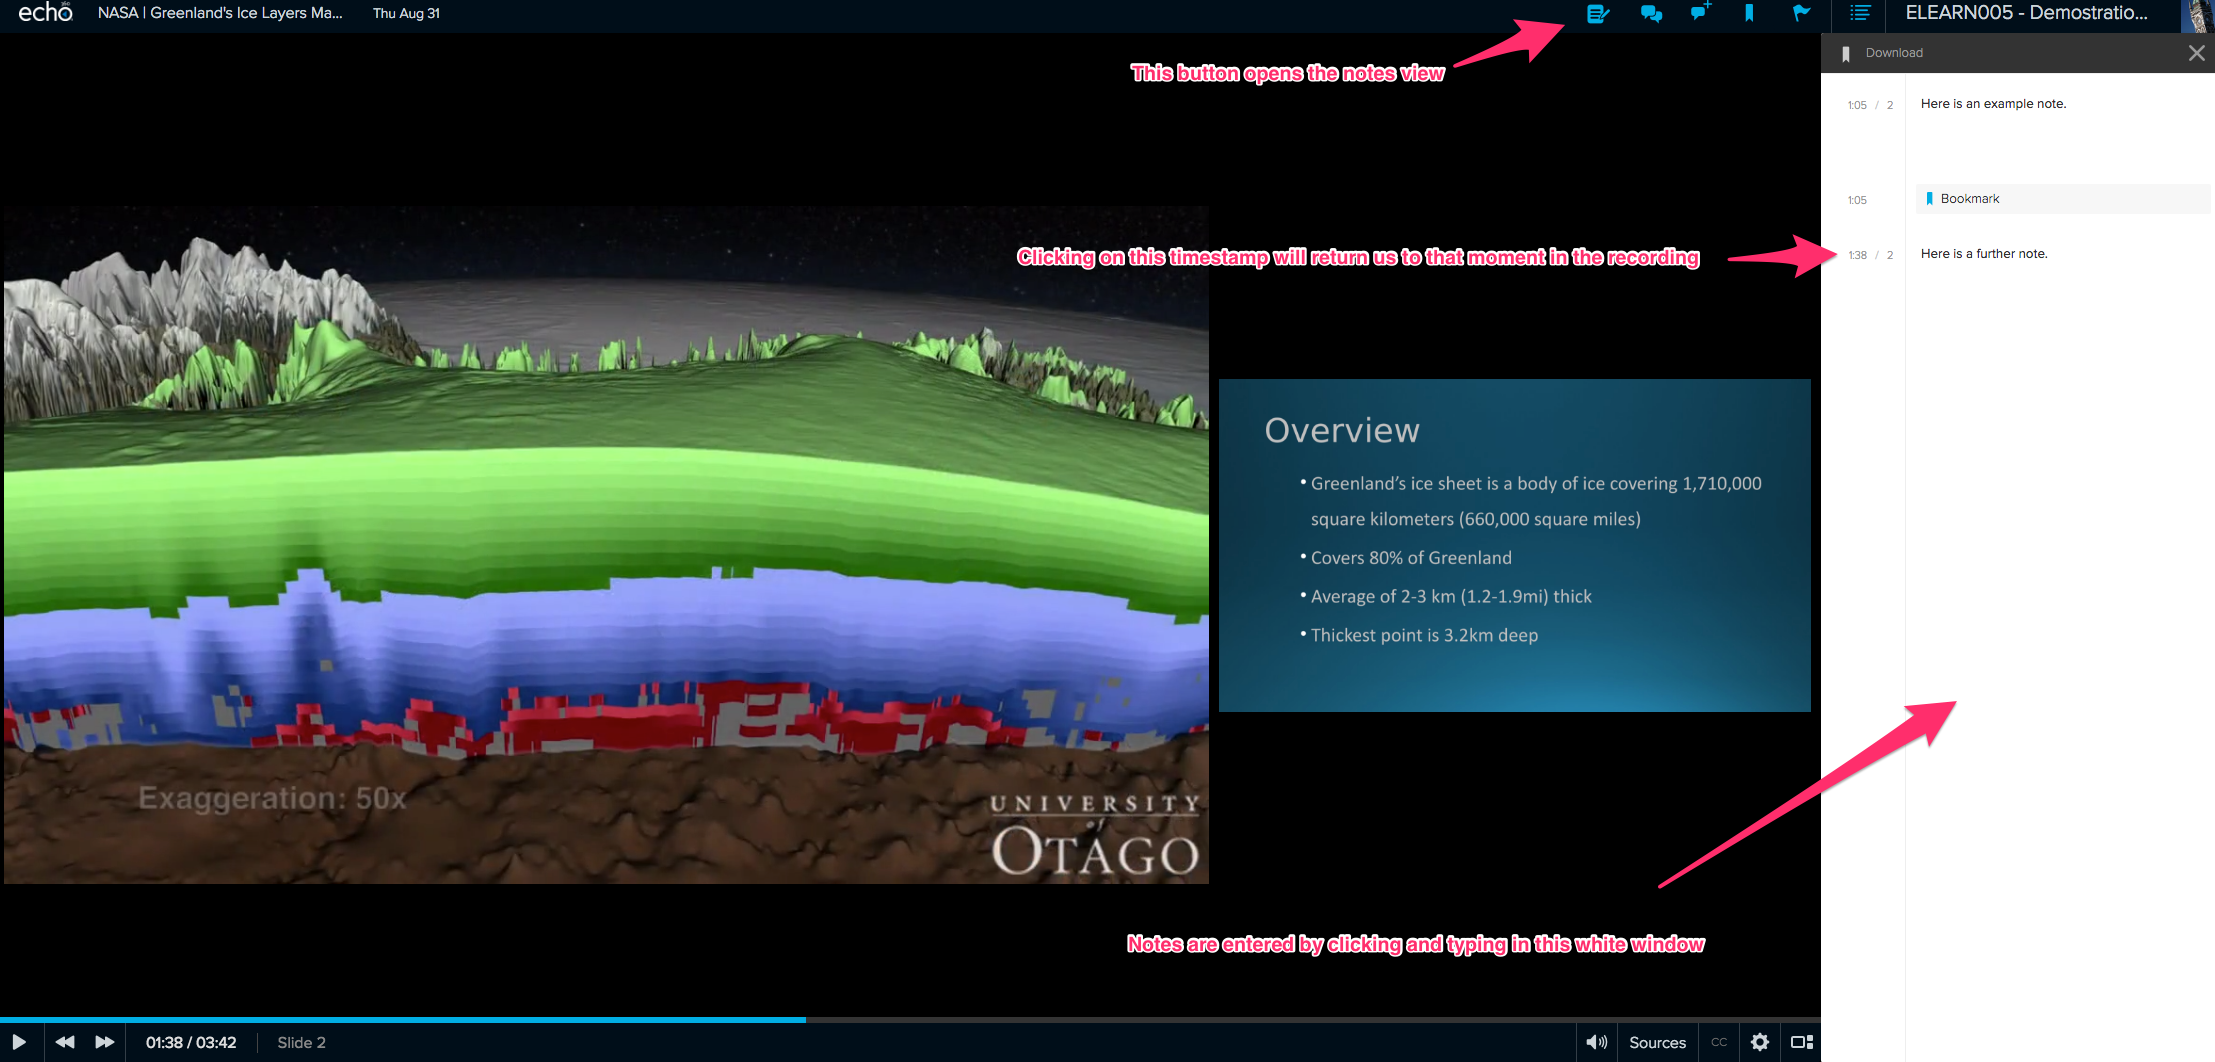
The view a student will have when taking notes alongside a lecture
These notes and annotations are easily collated and accessed from the Study Guide tab. Within this tab, a student can view her notes for any given lecture.
Student notes are private and can only be viewed by the student who took them. However, for analytics purposes, Course Co-ordinators will be able to see the number of words of notes a given student has taken (while not being able to access the content of those notes).
Since the entire point of this system is to group student notes alongside course content, these tools function best when used onscreen, within the Otago Capture application. However, if a hard copy or archival format is required, it is also possible for students to export their notes and bookmarks in a .txt format. This exported format does not include the course content, but does include all the work that the student has created, along with written (non-clickable) timestamps to provide the context.
New Date for Blackboard update
Due to circumstances out of eLearning’s control we are postponing the upcoming update until December 18th. This means there will be no outage for Blackboard on Wednesday the 22nd of November.
We will have more information about the Update on the 18th of December closer to the time.
Bulk downloading of old recordings from Otago Capture
If you own an Otago Capture section from 2015 or 2016 you should have recently received an email alerting you to the fact that your recordings for those years will soon be deleted, as part of our transition to the new cloud-based version of Otago Capture.
You may wish to download those recordings. There is quite a straightforward process for downloading these recordings, which is explained in our help site.
However, we’ve had a few enquiries from staff who have a large number of recordings stored in Capture. Downloading the recordings one by one is fiddly and time-consuming when there is a large set to get through.
My colleague Luke Erickson has developed a workaround that should lead to significant same-savings in such cases. In a nutshell, the idea is to enable an RSS feed with iTunes metadata for your section, and then use iTunes to download all the recordings in that section. Because it includes metadata, the files should be correctly named and grouped in a helpful folder in your iTunes library.
The first step requires RSS to be enabled for your sections. As a section owner, this is not something you can action, but if you contact Service Desk, they will be able to change the settings for your section. Ask them also to send you a URL for the RSS feed, specifically for the ‘vodcast’ option of your recordings (this means that the downloaded recordings will also include video if present).
Now open iTunes on your computer. Select ‘Subscribe to podcast’, and paste the RSS feed into the resulting box. This should then download the stream of files from your section (you may need to press a download button for each file if they don’t download automatically). The screenshot below includes some more detail on this.
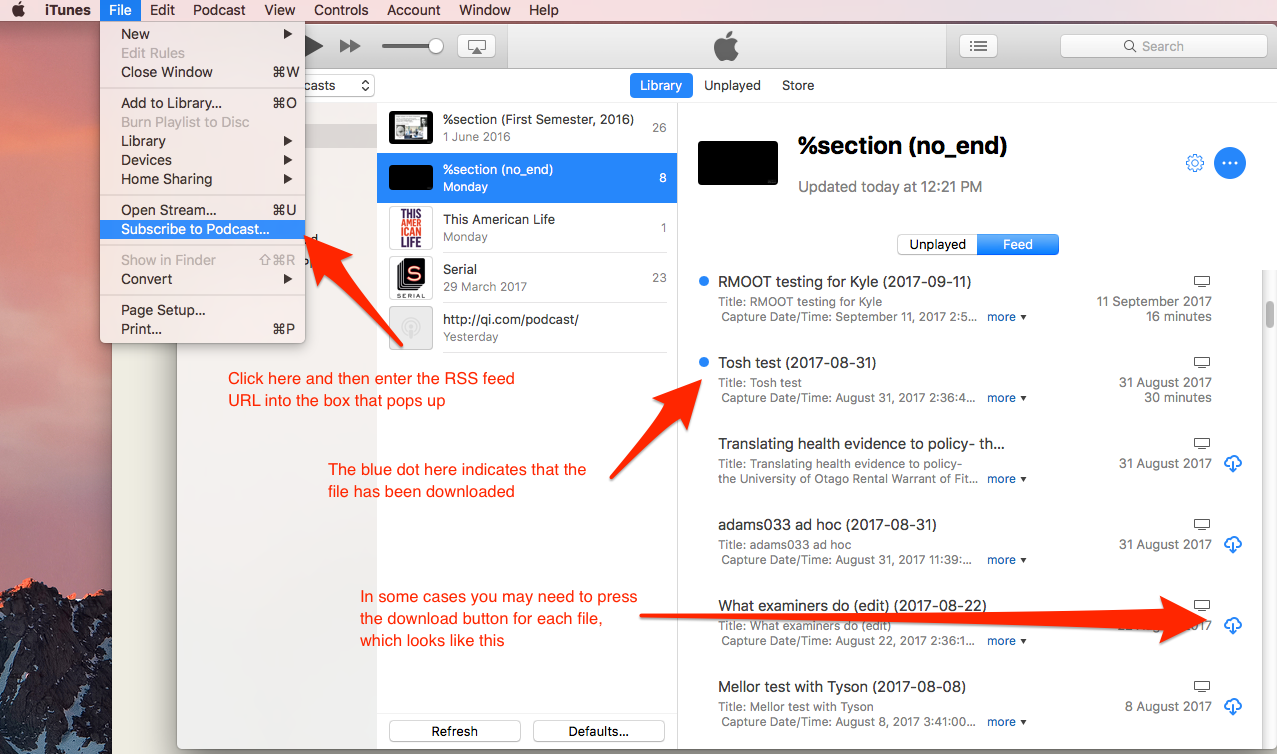
Once the files have downloaded, you can right click on any of them within iTunes, and select ‘Show in Finder’. This will show you where your recordings are stored on your computer, and you can copy or back them up accordingly.
These instructions are written for a recent version of iTunes (12.7) for Mac OS X. Service Desk may be able to assist if you need help in tailoring the steps for iTunes on a PC, or for an older version of the software.
