
3Bee Printing
In eLearning, we offer a 3D printing service for University staff and departments. Using two printers, we create 3D models, parts, and equipment out of extruded plastic. Sometimes staff request objects as teaching resources (models of bones and molecules, for example), and sometimes they request objects to aid research projects. A fun aspect of our work here in eLearning is that these requests offer us a very minor (but fascinating) glimpse into the experiments and projects that are going on in departments across the University.
An especially endearing request came through recently from Dr Jenny Jandt in Zoology, who required a set of sugar dishes to set up as bee-feeders. The dishes fit together pefectly with a standard specimen jar, which is filled with sugar water and then inverted. Special notches in the dish allow the bees to dip their proboscides and feed on the sugar solution, without all the liquid draining out of the jar.
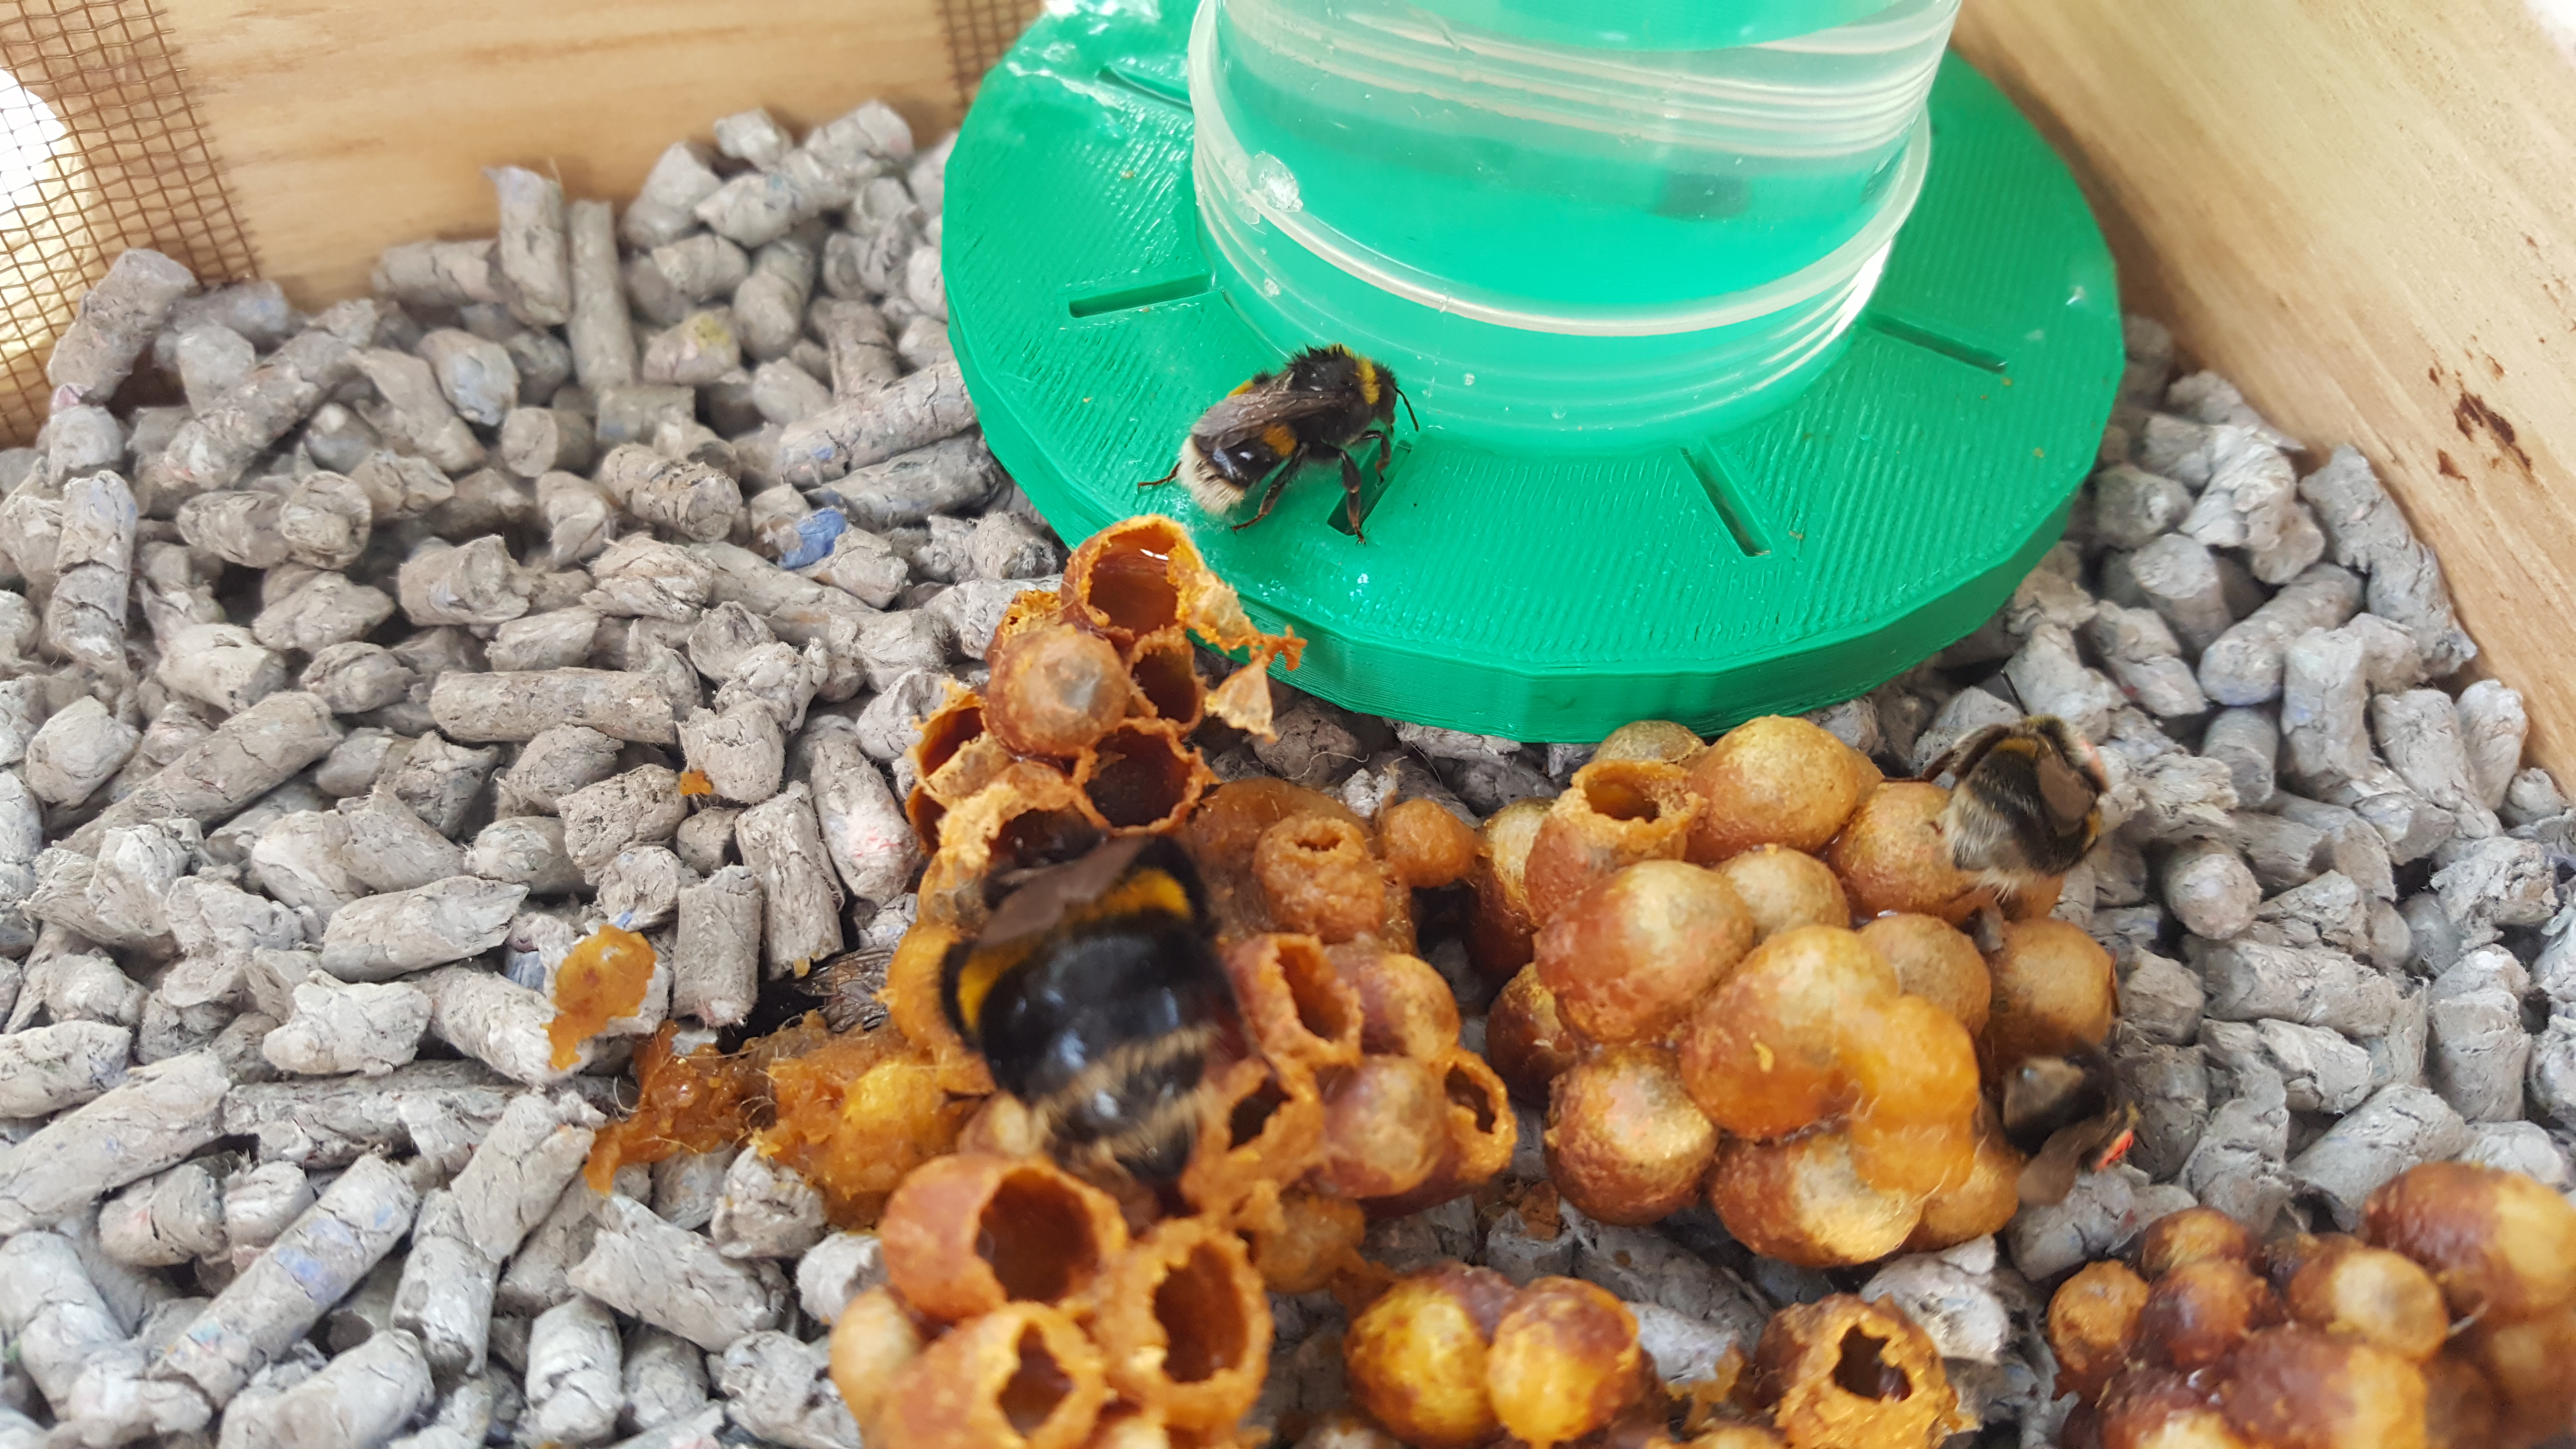
Like all of us, bees have to eat. And thanks to 3Bee printing, this little bee can.
Dr Jandt conducts research on the behaviour of bees, and on how bees are influenced by the environment. Dr Jandt’s webpage can be found here. We admire Jenny not only for her scientific discoveries, but also for encouraging her students’ profound mastery of bee-related puns and wordplay: ‘The Honeymoon suite’, ‘No place like comb’, and so forth. The title of this blog post is a weak homage to these efforts.

The Honeymoon Suite: a perfect confluence of good science and good wordplay.
More on our 3D printing service can be found here. We warmly encourage contact from any departments who think this service may be of use, even for projects less adorable than Jenny’s. We are always happy to discuss requirements and possibilities. Thanks to Jenny for keeping us up to date on the project, and for providing the photos for this post.
Blackboard wikis and student group assessments
Wikis are a terrific – and underutilised – tool for enabling students to work collaboratively on projects.
There are two separate wiki systems available to Otago staff. Otago Wikis is a standalone offering with advanced features, which can be made available to the public. Blackboard wikis (which I will focus on today) is a more basic system that is available within Blackboard.
Wikis are easy for any coordinator to set up within a Blackboard paper, and offer a powerful resource for allowing groups to build up a large document with contributions from many individuals.
If you assign group projects in your course, wikis represent an effective way for your students to collaborate on the manuscript for a presentation or report. An additional benefit of wikis in this context is that the input of individuals is tracked, so it is straightforward to gauge and grade not only the final product of the group as a whole, but also the contributions of given members.
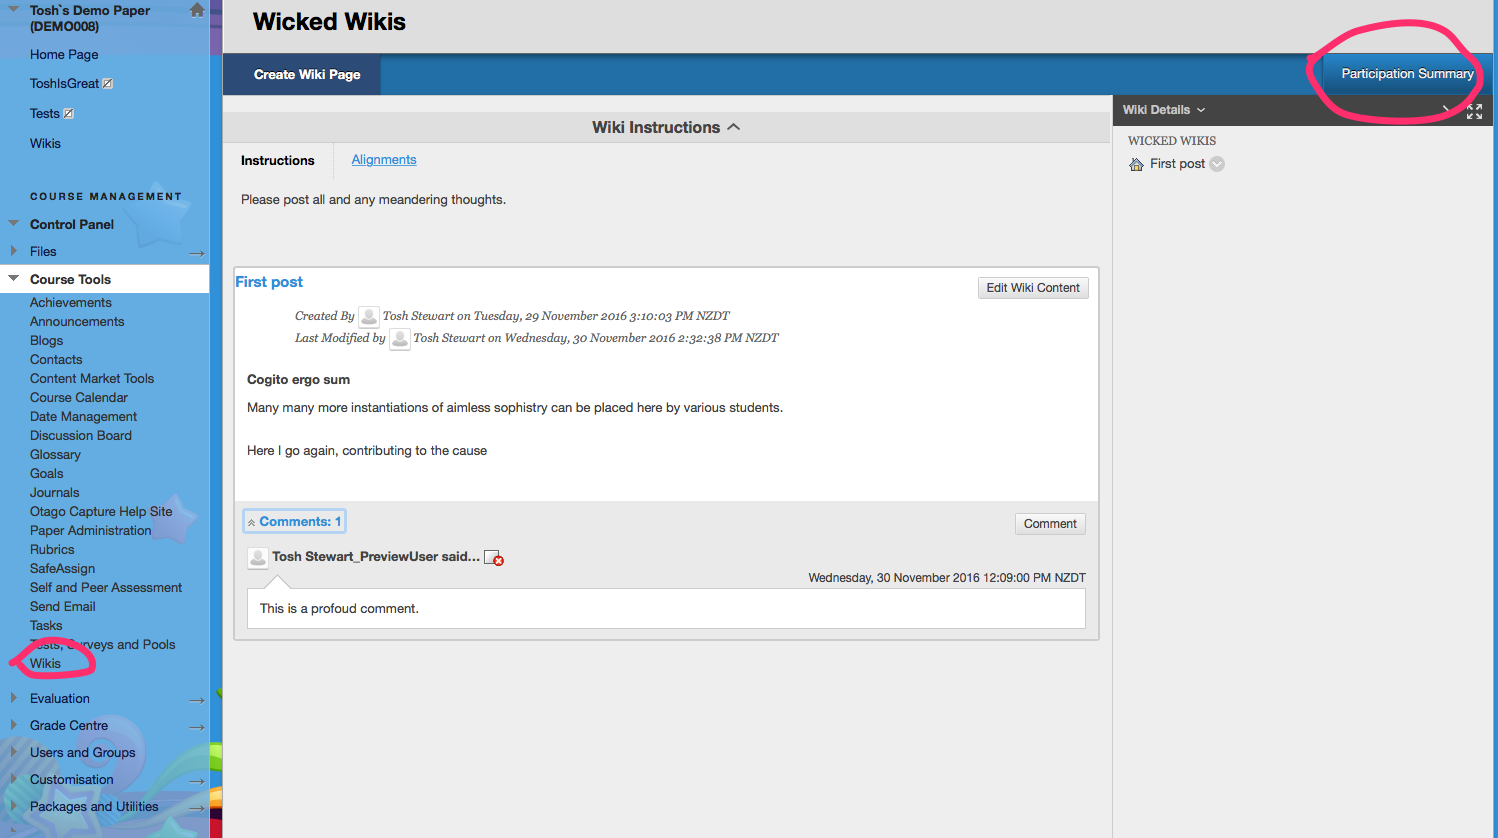
To set up a wiki, select the ‘Wikis’ option in the ‘Course Tools’ menu in your Blackboard paper. Once it is set up and students have built a page, you can investigate the history of that building process using the ‘Participation Summary’ function. These links are highlighted in the screenshot above.
Within the Participation Summary, select a given user to track and (if desired) evaluate the contributions she has made to the overall project. This information can be presented in a helpful ‘Page Comparison’ view, as in the example shown below.

Beyond student group assessments, there are many possibilities for incorporating wikis into your teaching praxis. For example, some lecturers use wikis so their students can contribute to building up an annotated bibliography as the course progresses. Others use wikis as an ongoing lab journal.
More information on setting up and using Blackboard wikis can be found on our Otago Blackboard helpsite for staff.
Inline grading with Blackboard
Online submission of assignments through Blackboard is now very common at Otago. Many lecturers choose to download their students’ submitted essays to their computer and edit the documents to provide marginalia, comments, and other alterations, before re-uploading. Marking in this way on your own computer is relatively straightforward using Microsoft Word’s reviewing functions, or other third party software.
However, an alternative method of providing this feedback to students is to use the “inline grading” functionality which is built right into the Grade Centre in Blackboard. Inline grading uses a tool called “crocodoc”, which has been part of Blackboard for Otago users since an update in December 2014. When marking using inline grading, all the alterations are completed within Blackboard itself. Mark-ups are automatically saved and can be returned to later.
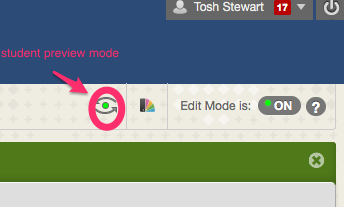
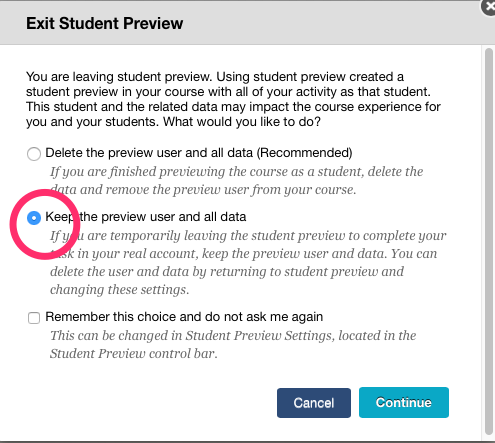
To use inline grading, visit the Grade Centre, and select an assignment to mark. You may want to enter Student Preview Mode and upload an assignment of your own that you can experiment on. In preview mode, visit the assignment as a student, upload it, and then exit preview mode, being careful to select the option to keep your preview data.
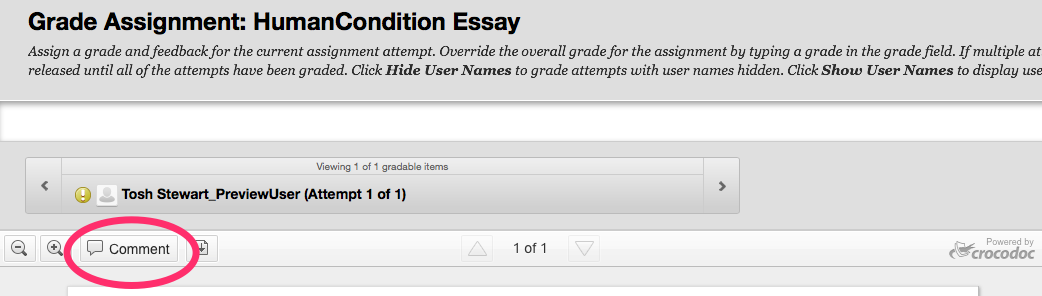
If you then find and bring up your assignment in the Grade Centre, you can see a button which says “comment”. Clicking this brings up the series of tools you can use with inline grading.
Inline grading offers several benefits over downloading-and-marking. Firstly, the interface for crocodoc is very simple, and includes all and only the tools a grader will typically need. To my eye, at least, this makes inline grading more straightforward to use than Word’s reviewing functions.
Secondly, inline grading cuts out the steps of downloading the essays, opening each, resaving each with alterations, and then re-uploading the new version to Blackboard – so it may be more time efficient. Because all the data is continuously stored and ordered online, inline grading simplifies the task of organising and keeping track of student files.
On the other hand, a drawback to inline grading is that an internet connection to Blackboard is required at any point when one wishes to mark. The system also may not work particularly effectively on tablet devices.
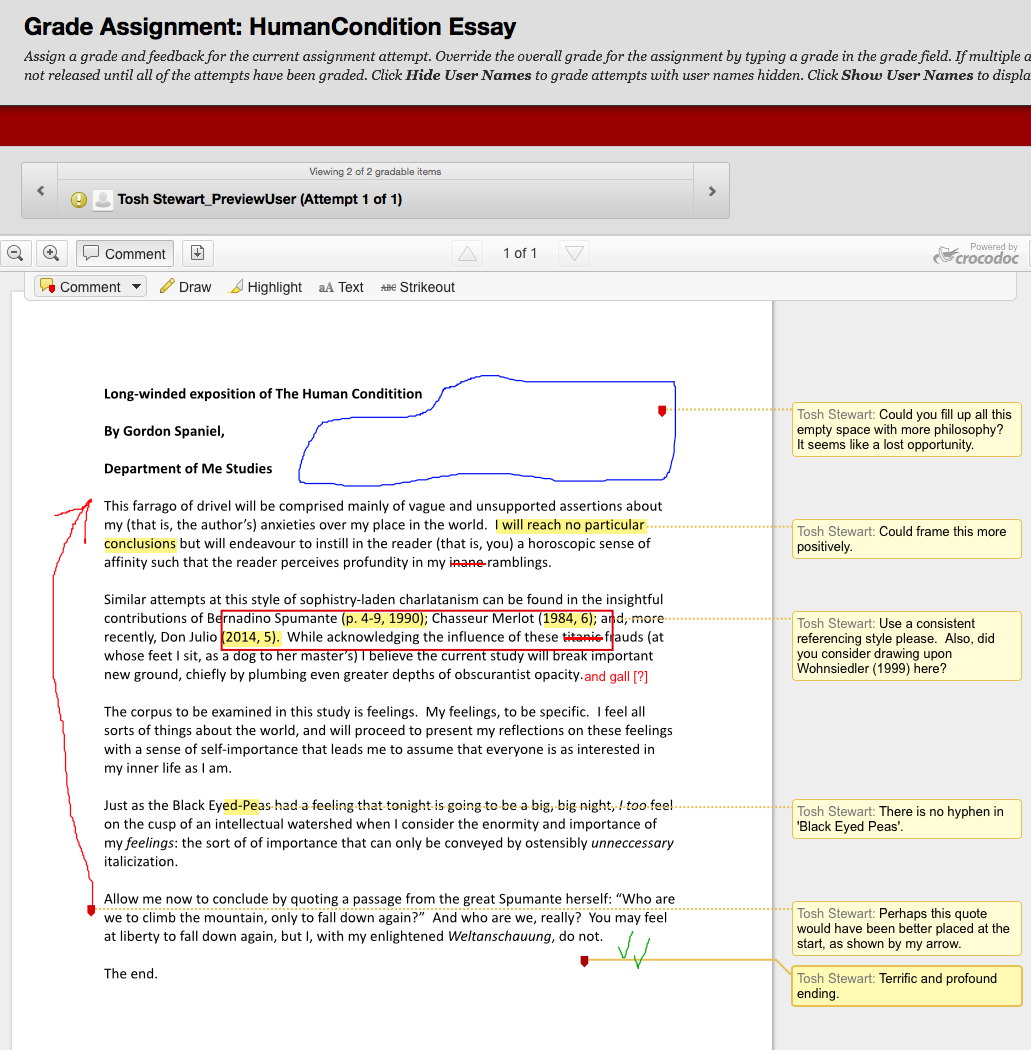
In the screenshot below, I have marked up an example essay, which demonstrates the range of reviewing functions that crocodoc allows.
Further instructions on the use of inline grading are available on our Blackboard Helpsite, or on Blackboard’s short tutorial video (less than three minutes).
