Paper Making – My First Encounters
by
Nakita Corfield
Dargaville High School
It was there! After school, while exploring through my grandfather’s shed I found a
“How-to-make paper” guide. You see, after witnessing my after school delicacies of blackberries that grow across the gravel road being covered with dust as cars drove by, I knew I had to take action against waste contamination.
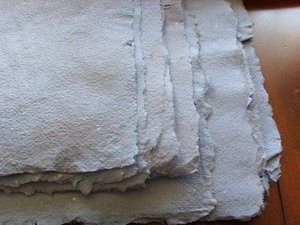
And it was there, at that moment when I found the kit that I knew I could do something about it. I could use paper that I drew on, spilt juice on, and even paper that my dog had stepped on with her wet and dirty paws to make new and fresh paper. I spent hours ripping apart paper into the tiniest pieces that I was able to make. Next, I would soak the torn paper for a couple of nights to soften it. Then I could use my blender to create a pulp. Once this step was complete, the hard part was over. All I had to do is lay the pulp onto drying racks and wait. This was the most irritating part for my 7 year-old self. All I wanted was to witness my magnificent masterpiece reborn.
My paper looked nowhere near as good as store bought fresh paper. The oddly coloured grey pulp sat in uneven piles all over the rack. If I didn’t allow enough time for the paper to completely dry, it would crumble through my fingers. So getting the timing right was key.
Little did I know that 10 years later I would be researching the` Kraft Process’ of how paper is created through NCEA. This research internal made me realise that I was introduced a lot sooner to science than I initially thought. It wasn’t when I first made hokey pokey during my intermediate years, it was even sooner – I just didn’t understand it yet. At the age of 7, I accomplished the art of papermaking. Like how I pulled apart old pieces of paper whereas paper mills finely dice the wood that they receive into the correct sizes, ready for the cooking process. However, unlike H2O that I used to soak the pulp in, a special solution called white liquor which is a mixture of sodium hydroxide and sodium sulfide is used. This removes the lignin – a substance in trees which make the cells of the trees wood hard. Once all of the required lignin is removed from the pulp, it is then screened for any knots and twists that were missed. If only I had added this step into my process! Then I would have had clean smooth paper. An extra step at the paper mills of bleaching the pulp is added. This enables the paper to become the desired colour. Finally, like my process, the pulp is laid out and left to dry.
Now that I know what steps I can use to make my homemade paper even better, I hope to use it in the near future!


Recent Comments