
Sometimes your Zoom recording may have captured too much at the start, finish or both of your event, and you would like to remove those parts of the recording. This can easily be done on Windows 10 using the Photos app which comes free with Windows 10.
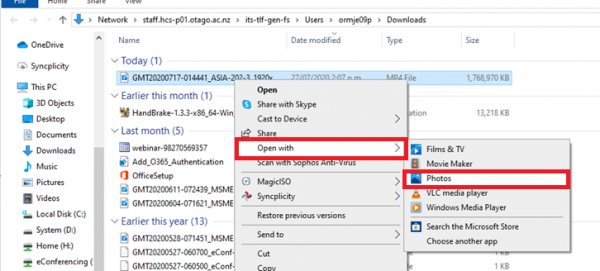
- Open your recording in the Photos app. If you have recorded your Zoom meeting to Cloud then you will need to download it first. Locate your recording, generally it will either be in your Documents folder under Zoom (if recorded to your local computer) or in your Downloads folder if downloaded from the Cloud. Right click on the recording to bring up a menu then go to “Open with” and select “Photos”
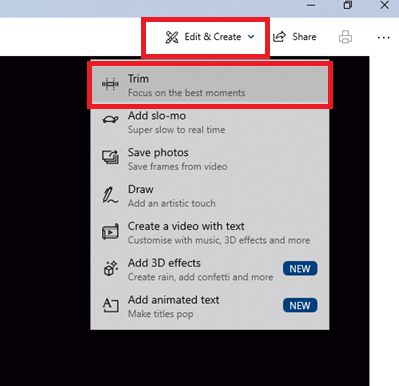
 2. In Photos, go to the top right and click “Edit & Create” then select “Trim”
3. The timeline at the bottom of your recording will now have a blue marker which you can adjust to certain points. For trimming the start, find the time you want the recording to start at and place the blue marker there, then slide the left hand white marker to that point. Repeat this process to trim the end of the recording but this time slide the right hand white marker to the blue one. You can check that the points are correct by playing the recording once you have positioned your edits. The playback will start from where you place the blue marker so move it around to test the start and end without needing to watch the whole recording. Please note that sometimes it will not be possible to select the exact time you need, however just select the closest most appropriate time.

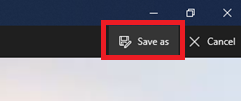
4. Once you are happy with the edit points you have created, go to the top right corner of the Photos app and select “Save as”
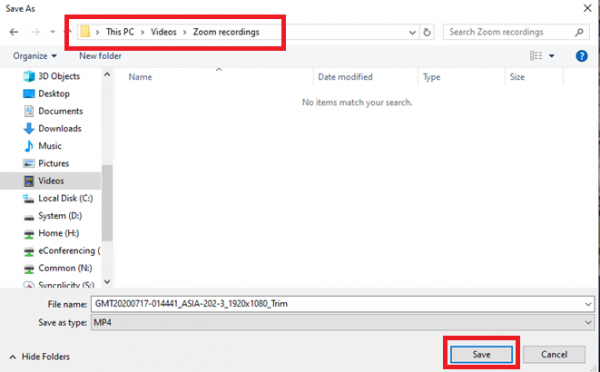
5. Select an appropriate location to save your file and click Save
6. Your recording will now begin processing and will save the edited recording to the location you have chosen. This process can take quite some time depending on how big your recording file is and how fast your computer is. It is common for the process to take anything from 10 minutes to an hour. You will see a progress bar in the middle of the recording which indicates where it is in the process.

If you need to do more complex editing, such as removing a section from within the middle perhaps, then please see here for instructions.
Alternatively, you may also wish to use a more sophisticated video editing application. OpenShot on Windows and iMovie on Mac are good free applications to use for this purpose. There are many resources online which step through how to use those applications to edit videos.
