
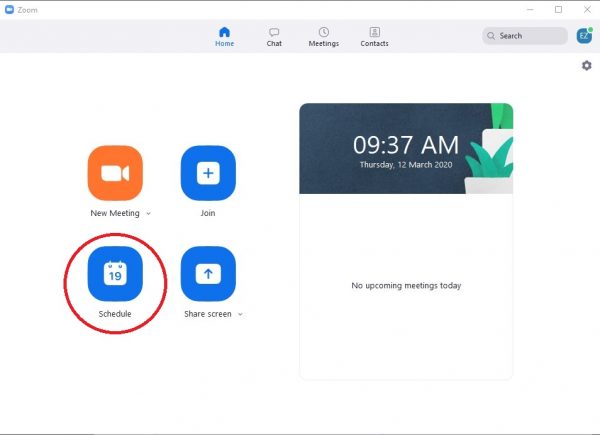
Make sure you have first installed Zoom and signed into the app
Click Schedule meeting on the Zoom App
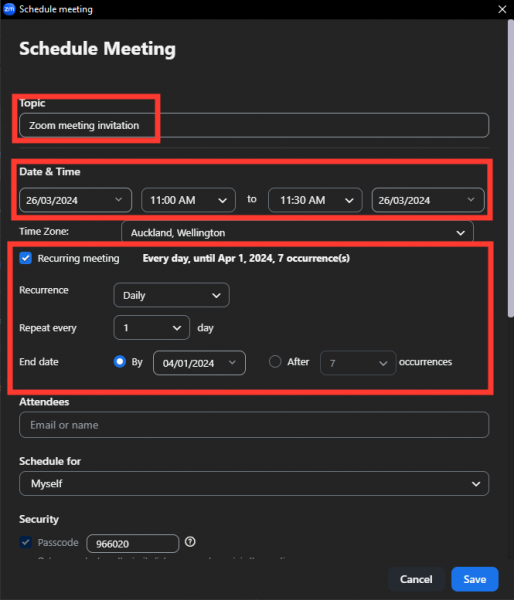
- Enter the name of your class/meeting/event in the Topic field
- Enter the start date and time in the appropriate fields for your event.
- If it is a recurring event, tick Recurring Meeting then select the necessary recurrence from the drop options that appear (please note if you wish to schedule a “recurring – no fixed time” event, then this now needs to be done in the Zoom web backend)
- Check you are happy with the other settings. Generally, the default settings are suitable for most meetings, however the “Waiting Room” option is a good security feature to help secure your event.
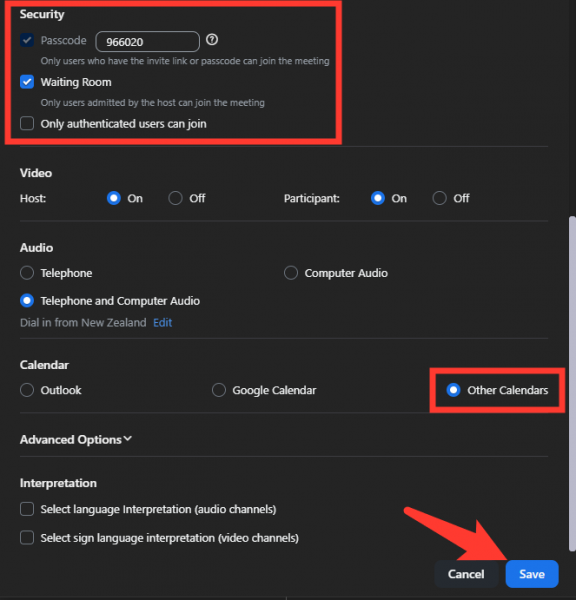
- Typically selecting “Other Calendars” under the Calendar heading is the easiest option as that will generate a pop-up window after clicking Save with the meeting details that you can easily copy and paste into an email or calendar invite of your choice.
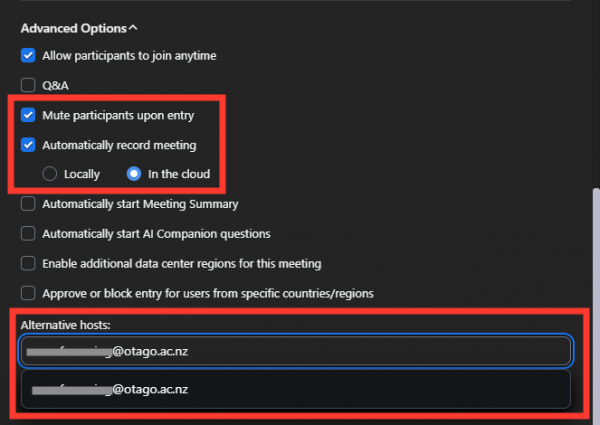
- Check the advanced options, you may like to add “mute on entry” so attendees come in muted (good for large meetings to avoid audio disruptions at the start of the meeting). Auto-recording to the cloud is a good option if you find it easy to forget that step on the day. And you may like to add a colleague as an alternative host (add their email into the field) so they can host the meeting in your absence.
- Click “Save”
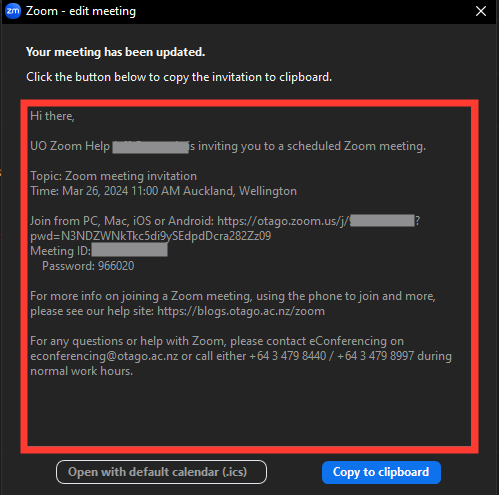
Your meeting is now setup and is available to use at anytime. You can copy the connection details (as highlighted below) and provide to your students via Blackboard or Moodle or send out to your attendees via email, calendar invite or your normal communication channel.
There are some additional settings that can be utilised by scheduling a meeting through your Zoom account on the web. There is some additional information on that here:
